

How Do You Test Your Soil DIY garden drainage test — and Does It Actually Matter?
You've been adding compost, lime, and fertilizer to your vegetable garden for years — but have you ever measured what your soil actually needs? Most weekend gardeners haven't. And that means you could be wasting money on amendments your soil doesn't need, or worse, missing a deficiency that's quietly limiting your harvest. food forest site assessment adding lime to raise soil pH
A soil test tells you exactly what's happening below the surface: pH, nutrient levels, organic matter content, and whether your amendments are actually working. University extension services across the US offer professional lab tests for as little as $10–15 per sample — less than a bag of fertilizer — and the results can cut your amendment spending by 30–50% while improving yields. Here's how to choose the right testing method for your garden, from free DIY kitchen tests to comprehensive lab analysis.
What you'll learn in this guide:
- Three DIY soil tests you can do this weekend with materials from your kitchen
- How accurate home test kits really are — and where they consistently fail
- What a professional lab test measures and why it's worth the $10–15 investment
- Step-by-step instructions for collecting a proper soil sample
- How to read your results and turn them into an amendment plan
Key Takeaway
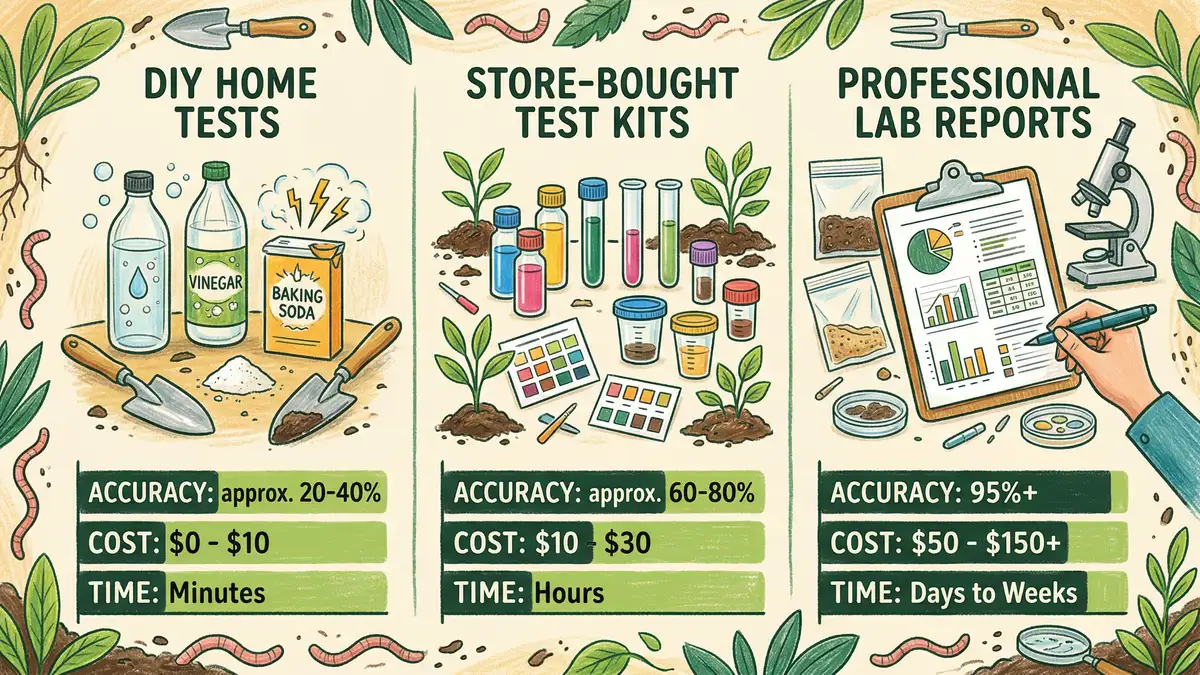
DIY tests are great for quick screening, but home test kits are unreliable for nutrients — studies show they can be "wildly off" compared to lab results. For a vegetable garden, a $10–15 university extension lab test is the most cost-effective way to get accurate pH, NPK what NPK numbers mean, organic matter, and micronutrient data. Test every 2–3 years, ideally in fall.
What Can You Learn From DIY Soil Tests?
You don't need a lab to get useful information about your soil. Three simple DIY tests give you a solid starting picture — and they cost nothing. These are screening tools, not precision instruments, but they'll tell you whether something is seriously off before you invest in lab work.
The vinegar and baking soda pH test uses basic kitchen chemistry. Place a tablespoon of soil in two separate containers. Add white vinegar to one — if it fizzes, your soil is alkaline (above pH 7.0). Add baking soda mixed with water to the other — if it fizzes, your soil is acidic (below pH 7.0). No reaction from either? Your soil pH is likely in the neutral range of 6.5–7.5. The limitation: this test tells you the broad category but can't distinguish between pH 6.3 and 6.8 — a difference that matters for specific crops.
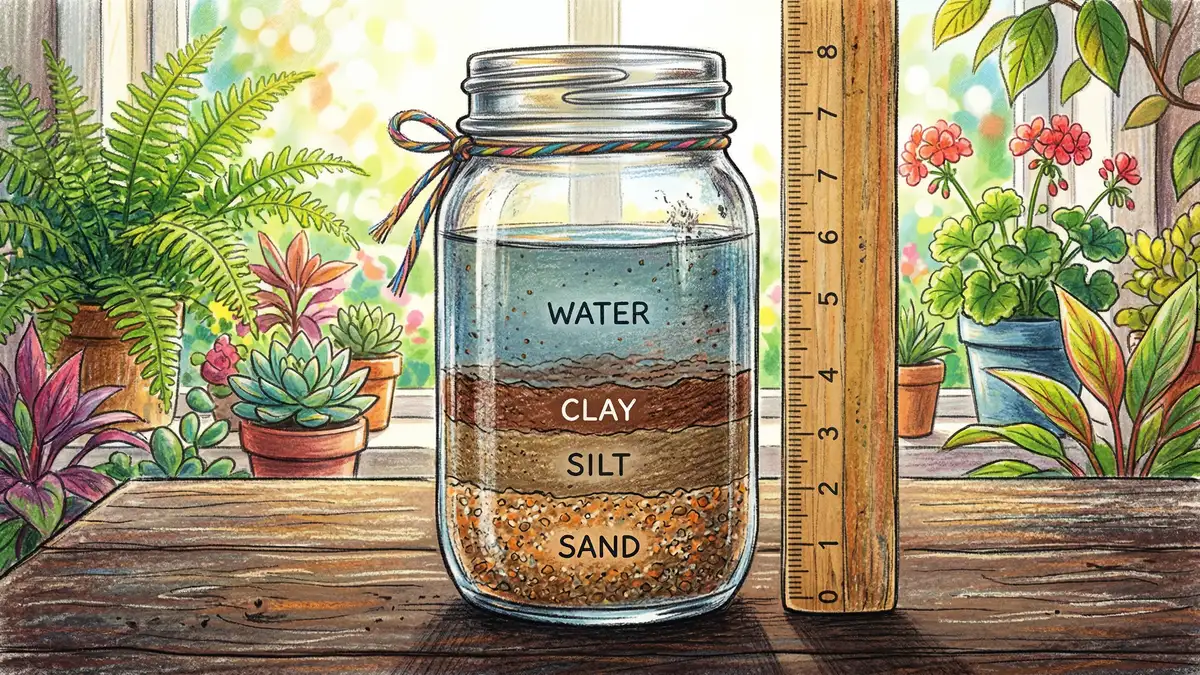
The jar test for soil texture is more precise. Fill a straight-sided jar one-third with sifted soil, add water to near the top, shake vigorously for one minute, then let it settle undisturbed. Sand drops to the bottom within 1–5 minutes. Silt settles in about 2 hours. Clay takes 48 hours or more. Mark each layer and measure the percentages — a reading of roughly 55% sand, 33% silt, and 7% clay tells you you've got sandy loam. Knowing your texture helps predict drainage, water retention, and which amendments will be most effective.
The earthworm count gives you a quick biological health check. Dig a 12-inch (30 cm) cube of soil and count the earthworms. Fewer than 5 per cubic foot suggests poor biological activity — your soil likely needs more organic matter. 10 or more earthworms per cubic foot indicates healthy biology with good decomposition and nutrient cycling.
How Accurate Are Home Soil Test Kits?
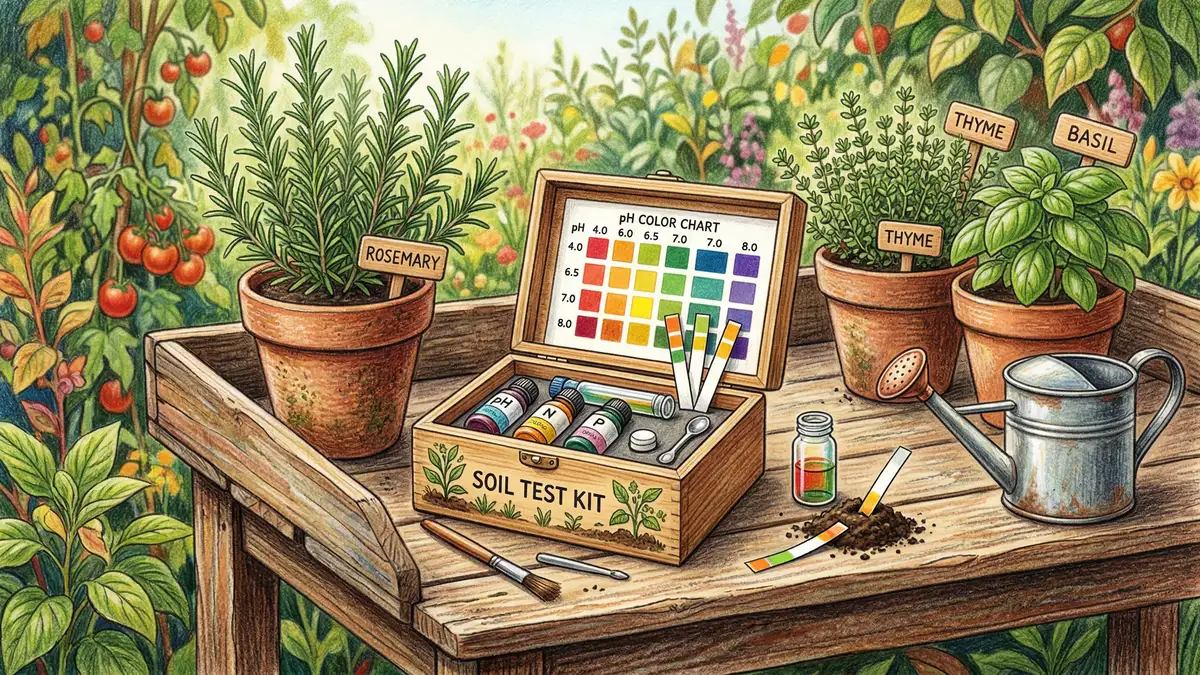
This is where things get complicated. Home test kits from brands like Rapitest and LaMotte promise to measure pH, nitrogen, phosphorus, and potassium for $10–60. They work through color-change chemical reactions — you mix soil with water and a reagent, wait, then compare the color to a reference chart. The results? Mixed at best.
| Measurement | Home Kit Accuracy | Lab Accuracy | Verdict |
| pH | ±0.5 pH units (color), ±0.2 (electronic probe) | ±0.1 pH units | Acceptable for screening |
| Phosphorus | Often "wildly off" — rated "sufficient" when lab showed 182 ppm (very high) | Parts per million, calibrated | Unreliable |
| Potassium | "Adequate" vs lab's 239 ppm ("borderline very high") | Parts per million, calibrated | Unreliable |
| Nitrogen | "Deficient" — but labs don't even test it this way (nitrate is transient) | Calculated from organic matter % | Misleading |
Sources: UNH Extension, 2020, South Dakota State Extension, 2025
South Dakota State University Extension tested multiple kits and concluded that "all of the soil test kits used were inconsistent at estimating the level of nutrients" in the soil. The fundamental problem is the methodology — home kits use color-change reactions on fresh, uncrushed soil, while labs use standardized chemical extraction methods (like Mehlich-3) on air-dried, ground samples. The results aren't comparable.
pH is the one area where home kits perform reasonably. Electronic pH probes achieve ±0.2 unit accuracy — close enough for most garden decisions. But for nutrient levels, you're essentially guessing.
Don't Over-Fertilize Based on Kit Results
Home kit NPK readings can lead you to add fertilizer your soil doesn't need. Excess phosphorus doesn't just waste money — it runs off into waterways and fuels algae blooms. A study comparing kit and lab results found home kits rated phosphorus as "sufficient" when actual levels were already dangerously high. If you're making fertilizer decisions, use a lab test.
What Does a Professional Lab Test Measure?
A university extension soil test measures everything a home kit claims to — and much more, with calibrated accuracy. Here's what a standard $10–15 test includes:
| Parameter | What It Tells You | Target Range (Vegetables) |
| pH | Nutrient availability, lime needs | 6.0–7.0 |
| Phosphorus (P) | Root development, fruiting | 25–50 ppm (Mehlich-3) |
| Potassium (K) | Disease resistance, fruit quality | 100–200 ppm |
| Calcium (Ca) & Magnesium (Mg) | Cell structure, chlorophyll production | Varies by CEC |
| Organic Matter % | Soil structure, water retention, biology | 3–5% |
| CEC (Cation Exchange Capacity) | Nutrient-holding ability | Sandy: 1–5, Silt: 6–20, Clay: 21+ meq/100g |
| Lime Requirement | Exact tons/acre to reach target pH | Calculated per sample |
Sources: Penn State AASL, Ohio State Extension
The key metric most gardeners overlook is CEC (Cation Exchange Capacity). Think of it as your soil's battery — it determines how well your soil can hold and release nutrients. Sandy soils with low CEC (1–5 meq/100g) need smaller, more frequent fertilizer applications because nutrients leach quickly. Clay soils with high CEC (21+ meq/100g) hold nutrients longer but may need different amendment strategies. Knowing your CEC changes how you fertilize — and that's information no home kit provides.
The lab also gives you a lime requirement calculation based on your specific soil buffer capacity. Adding lime without this data is like adjusting seasoning without tasting — you might overshoot or undershoot by a significant margin. Penn State's AASL uses standardized methods calibrated for your region's soil types, making their recommendations directly actionable.
Get Our Free Soil Amendment Cheat Sheet
Join 10,000+ gardeners getting weekly tips on soil health, composting, and permaculture techniques that actually boost your harvest.
Send Me the Cheat SheetHow Do You Collect a Proper Soil Sample?
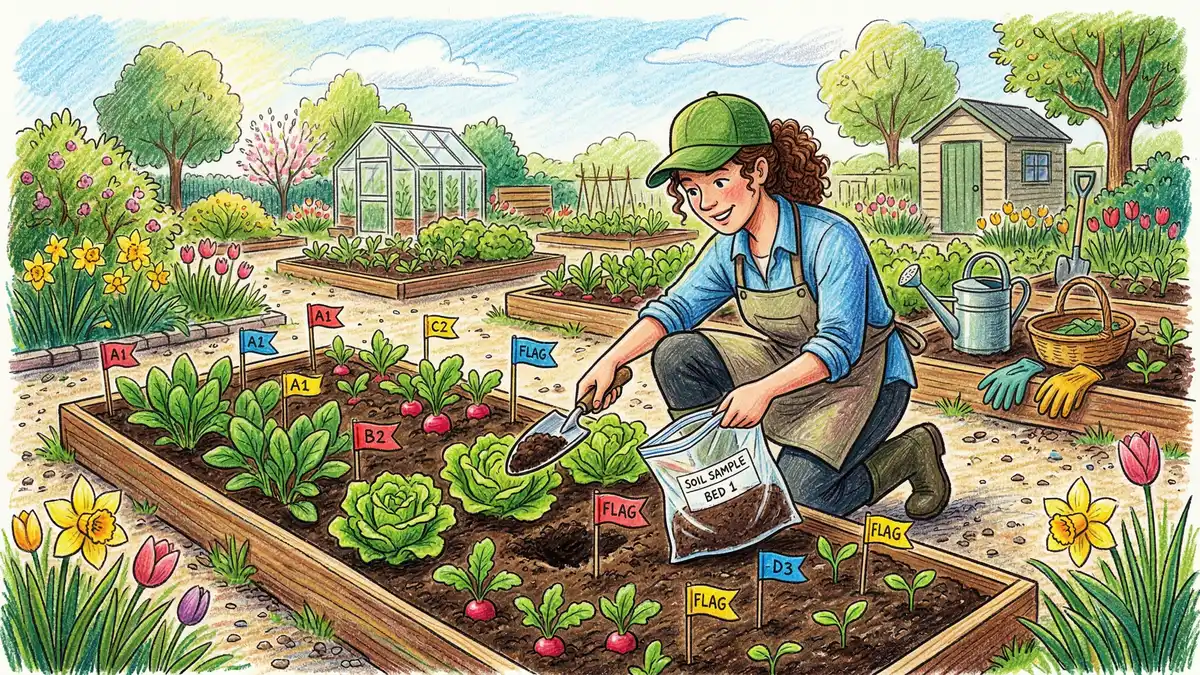
Even the best lab can't give accurate results from a bad sample. Here's the correct collection method — it takes about 20 minutes and makes the difference between useful data and misleading numbers.
Gather 10–15 Subsamples
Walk a zigzag pattern across the area you're testing. At each stop, push a trowel or soil probe to a depth of 6–8 inches (15–20 cm) for vegetable gardens, or 3–4 inches (7–10 cm) for lawns. Place each subsample in a clean bucket. Avoid sampling near fence lines, compost piles, or recently amended spots — these create unrepresentative readings.
Mix and Reduce to One Cup
Combine all subsamples in the bucket and mix thoroughly with your hands or a clean trowel. Break up any clumps. Remove rocks, roots, and debris. Scoop approximately 1–2 cups of the mixed soil into a clean plastic bag or the container provided by your lab. Label it clearly with your name, sample location, and what you plan to grow.
Submit to Your Extension Lab
Find your nearest university extension lab at USDA NRCS or search "[your state] extension soil test." Most accept mail-in samples with a form specifying what you're growing. Results typically arrive in 1–3 weeks. Cost: $10–15 for standard analysis, $25–50 for comprehensive packages including micronutrients and organic matter.
Why This Works: Observe and Interact
In permaculture, the first principle is "observe and interact" — understanding your environment before changing it. Soil testing is exactly this principle applied to the ground beneath your feet. By measuring what's actually there rather than guessing, you avoid the common trap of adding amendments that mask problems rather than solving them. A soil test doesn't just save money — it builds the kind of deep site knowledge that permaculture practitioners use to design gardens that work with natural systems instead of against them.
When Should You Test Your Soil and How Often?
Fall is the ideal time to test in most US climates. Testing in September through November gives you winter to plan amendments, order materials, and apply lime — which needs 2–3 months to adjust pH before spring planting. Spring testing works too, but leaves less time to act on the results before the growing season starts.
For established vegetable gardens, test every 2–3 years. Annual testing is overkill unless you're troubleshooting a specific problem or managing intensive production. For new garden beds, test before your first planting and again after the first full season to see how your amendments performed. If you're converting a lawn or building compost-heavy beds, that initial test is essential — don't skip it.
Between lab tests, use DIY methods to spot-check. A vinegar/baking soda pH test once per season confirms you're still in range. The earthworm count after adding organic matter shows whether your soil biology is responding. These free checks bridge the gap between professional analyses without replacing them.
Key Takeaway
Test in fall for best results. Established gardens need testing every 2–3 years; new beds need testing before first planting. Use free DIY methods between lab tests to monitor trends — but rely on lab data for fertilizer and lime decisions.
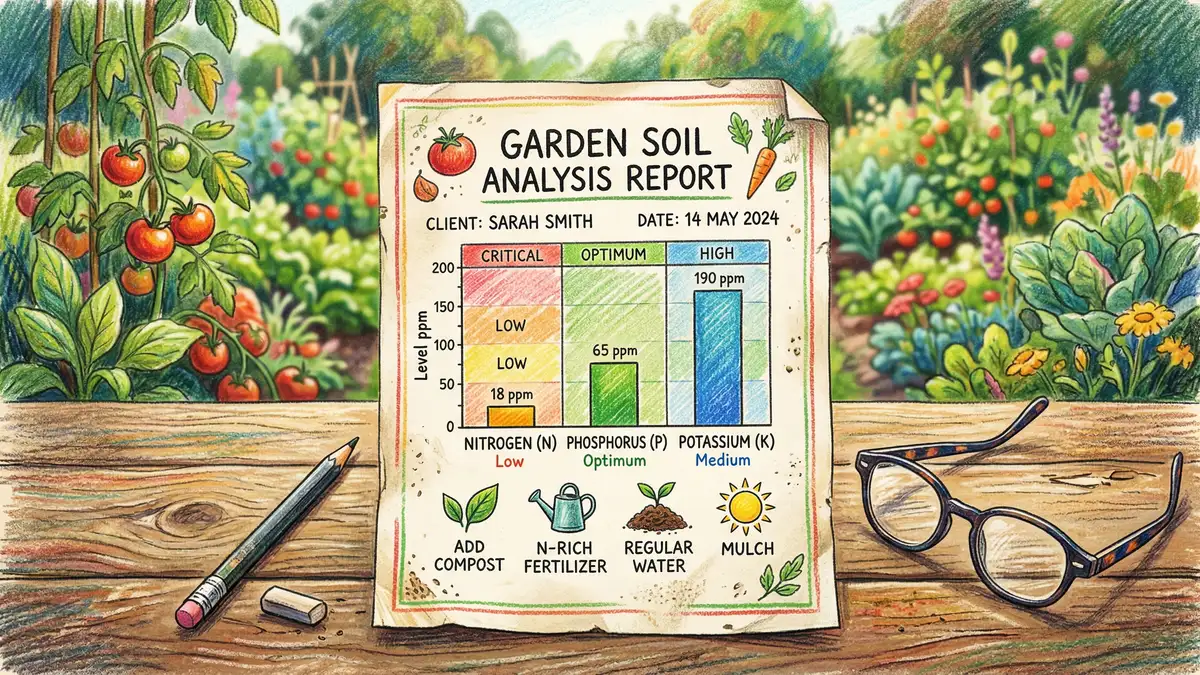
How Do You Read Your Soil Test Results?
Lab reports can look intimidating, but you only need to focus on a few key numbers. Here's how to interpret the results that matter most for a vegetable garden:
pH below 6.0: Your soil is too acidic for most vegetables. The lab report will include a lime recommendation — follow it. Apply lime in fall and retest the following year to confirm the adjustment worked. If you're growing acid-loving blueberries or potatoes, a slightly lower pH (5.5–6.0) is actually ideal.
pH above 7.5: Too alkaline. Elemental sulfur or acidifying amendments like pine needle mulch can help, but they work slowly. Organic matter additions (compost, aged manure) buffer pH in both directions — another reason to prioritize organic amendments over synthetic fixes.
Phosphorus above 50 ppm: Stop adding phosphorus-containing fertilizers. Excess P doesn't help plants and causes environmental damage. Many garden soils in the US already have elevated phosphorus from years of over-application.
Organic matter below 3%: This is your primary improvement target. Add compost, aged manure, or cover crops to build organic matter over time. Every 1% increase in organic matter improves water-holding capacity by approximately 20,000 gallons per acre — a transformative change for drought resilience. If you're planning a perennial system, food forest design requires deep-profile testing at 12–24 inches to assess the subsoil your tree roots will access.
Frequently Asked Questions
How do you test soil at home without a kit?
The simplest home test uses vinegar and baking soda to check pH. Add white vinegar to a tablespoon of soil — fizzing means alkaline soil. Add baking soda mixed with water to a separate sample — fizzing means acidic soil. No reaction means near-neutral pH (6.5–7.5). You can also do a jar test for texture by mixing soil with water in a straight-sided jar and measuring the sand, silt, and clay layers after 48 hours of settling. These DIY methods are free but only provide rough approximations.
Are home soil test kits accurate?
For pH, reasonably so — electronic probes achieve ±0.2 unit accuracy. For nutrients (nitrogen, phosphorus, potassium), South Dakota State Extension found that all kits tested were "inconsistent at estimating nutrient levels." A University of New Hampshire evaluation confirmed home kits are "not the best choice" for nutrient measurement. If you need NPK data for fertilizer decisions, spend the $10–15 on a university extension lab test instead.
How much does a professional soil test cost?
University extension labs charge $10–15 for a standard test covering pH, phosphorus, potassium, calcium, magnesium, and lime requirement. Comprehensive packages including organic matter, CEC, and micronutrients run $25–50. Premium soil health packages with biological indicators (like MSU Extension or UMass) cost $100–140 but include active carbon and aggregate stability measurements. For most vegetable gardens, the standard $10–15 test provides everything you need.
When is the best time to test garden soil?
Fall (September–November) is ideal because it gives you the full winter to plan and apply amendments before spring planting. Lime, in particular, needs 2–3 months to adjust pH. Spring testing works if you're in a hurry, but apply amendments at least 3–4 weeks before transplanting. Avoid testing right after fertilizing or heavy rain — both skew results. For established gardens, testing every 2–3 years is sufficient unless you're troubleshooting a problem.
What is the most accurate way to test soil?
A professional laboratory test through your state's university Cooperative Extension service is the gold standard. Labs use standardized extraction methods (Mehlich-3 is most common), calibrated instruments, and quality-controlled procedures on air-dried, ground samples. The results include specific numerical values in parts per million — not the vague "low/medium/high" ratings of home kits — along with tailored fertilizer recommendations for what you're growing.
Ready to Grow Smarter?
Get our free 20-page beginner's guide to backyard food forests. Two printable worksheets, a year-by-month food-forest calendar, and a curated reading path to build better soil and bigger harvests.
Download the Free GuideResources
- Penn State Agricultural Analytical Services Lab — Soil Testing Methods
- UNH Extension — Are Garden Soil Test Kits a Good Alternative to Lab Testing?
- South Dakota State Extension — Are Cheap Home Garden Soil Test Kits Accurate?
- Montana State Extension — Test Kits vs Lab Comparison
- Ohio State Extension — Soil Testing for Horticultural Needs
- USDA NRCS — Soil Testing Guide (PDF)
- UC Master Gardeners — Soil Testing Resources


