

Picking the right worm fix smell mites and escape bin is mostly a question of how much food waste your household actually generates and how much harvesting labour you want to do. Build a $20 Rubbermaid tote and you'll spend an hour or two harvesting castings every few months. Buy a $130 Worm Factory 360 and harvest drops to 15 to 30 minutes monthly. Spend $400 on a Hungry Bin and you'll process up to 4 pounds of food waste daily for the next 15 years. There is no single best bin: there is a best bin for your kitchen, your patience, and your budget.
This guide compares 5 bin typologies (3 DIY, 2 store-bought premium options) with honest specifications, 2026 pricing, capacity, harvest method, and common failure modes. Plus a Cornell-backed setup checklist that works for any of them.
Quick answer
For most households generating 4 to 8 pounds of food waste weekly: the Worm Factory 360 ($110 to $145) hits the sweet spot of capacity, harvest ease, and durability. For under $25 and a willingness to harvest manually: a single Rubbermaid tote with drilled holes works fine. For premium long-term users processing serious food waste daily: the Hungry Bin ($375 to $450) is the only system designed for that scale. Stock at 1 pound of red wigglers (Eisenia fetida) per cubic foot of bedding. Maintain 55 to 77°F (13 to 25°C). Bedding is shredded cardboard plus newspaper, moisture like a wrung-out sponge.
Why red wigglers (and not earthworms)
Eisenia fetida, commonly called red wigglers, brandling worms, or tiger worms, are not the worms in your garden. Cornell Composting's six-step worm bin guide documents why they outperform every other species in confined containers: they evolved in leaf litter and manure piles rather than deep mineral soil, so they tolerate the high-moisture, high-carbon, low-mineral conditions that exist inside any worm bin. Common earthworms (Lumbricus terrestris) put in a bin will try to escape within days and usually die within weeks.
The biology that matters: red wigglers reproduce 50 to 100 percent per month under good conditions per Urban Worm Company's red wiggler reference guide. Start with 1 pound (about 1,000 worms), and your population doubles in roughly 12 months without buying any more. They tolerate 55 to 77°F (13 to 25°C); below 55°F activity slows dramatically, above 85°F they die. They eat 50 to 100 percent of their own body weight in food waste daily once mature.
For our deeper comparison of red wigglers vs garden earthworms, see our red wigglers vs earthworms guide. For broader context on starting any vermicomposting setup, our complete vermicomposting guide covers fundamentals.
Why this works (the permaculture insight)
A worm bin is the simplest possible closed-loop nutrient system at the household scale. Kitchen scraps go in, finished castings (one of the highest-quality natural fertilizers known to gardening) come out, and the same biological system processes both indefinitely. This is permaculture's "produce no waste" principle, one of Holmgren's 12 design principles, running on autopilot. The worms do the work; you just feed them once a week.
The 5 bin typologies compared
| Bin type | 2026 cost | Capacity (food waste / week) | Harvest time | Best for |
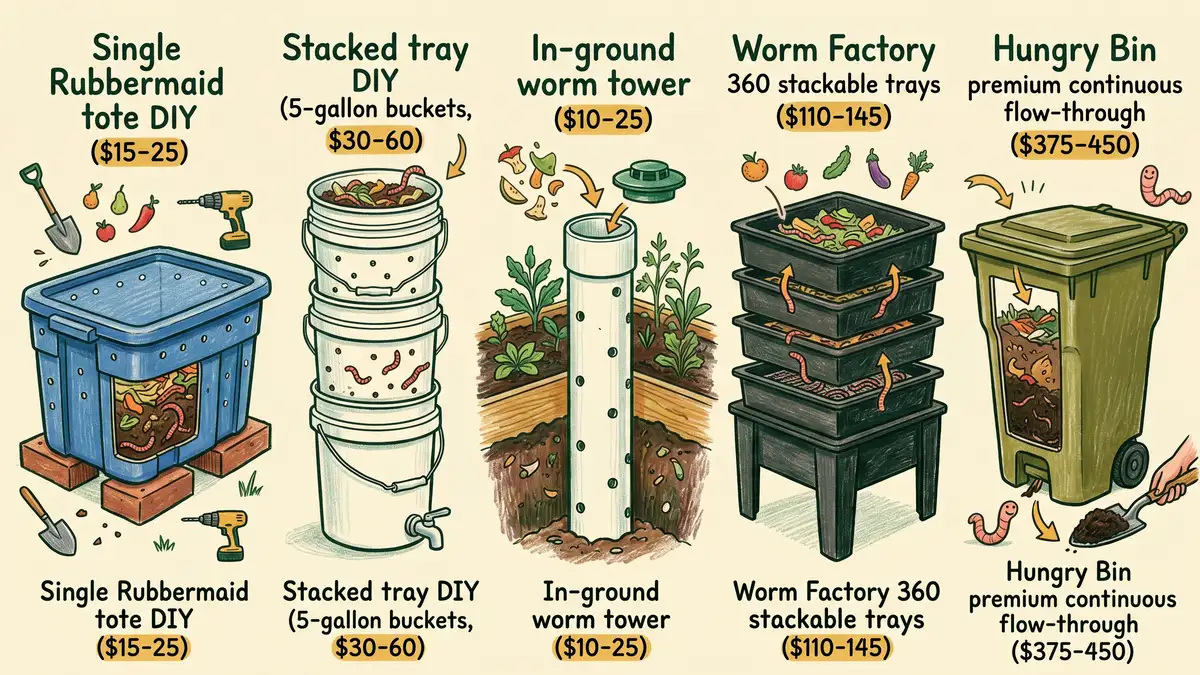
| Single Rubbermaid tote DIY | $15 to $25 | 2 to 3 lb | 1 to 2 hours, every 3 to 4 months | Beginners, single households, low food waste streams |
| Stacked tray DIY (3 totes or 5-gal buckets) | $30 to $60 | 5 to 7 lb | 20 to 30 min monthly (migration method) | Families, modest budget, those who like building things |
| In-ground worm tower (PVC pipe in raised bed) | $10 to $25 | 1 to 2 lb (in-situ feeding) | None, castings stay in the bed | Permaculture gardens, mild climates, supplementary system |
| Worm Factory 360 (Nature's Footprint, 4-tray) | $110 to $145 | 5 to 8 lb | 15 to 30 min monthly (tray rotation) | Most households; the popular default |
| Hungry Bin (premium continuous flow-through) | $375 to $450 | Up to 28 lb (4 lb daily) | 10 to 15 min monthly (side chamber harvest) | Large households, restaurants, 10+ year commitment |
Sources: The Compost Culture, Best Worm Compost Bins 2026; Brothers Worm Farm, Ultimate Guide to 9 Best Worm Composters; Worm People, Choosing a Worm Bin Type; NC State Cooperative Extension New Hanover, Vermicomposting Guide
The 3 DIY options in detail
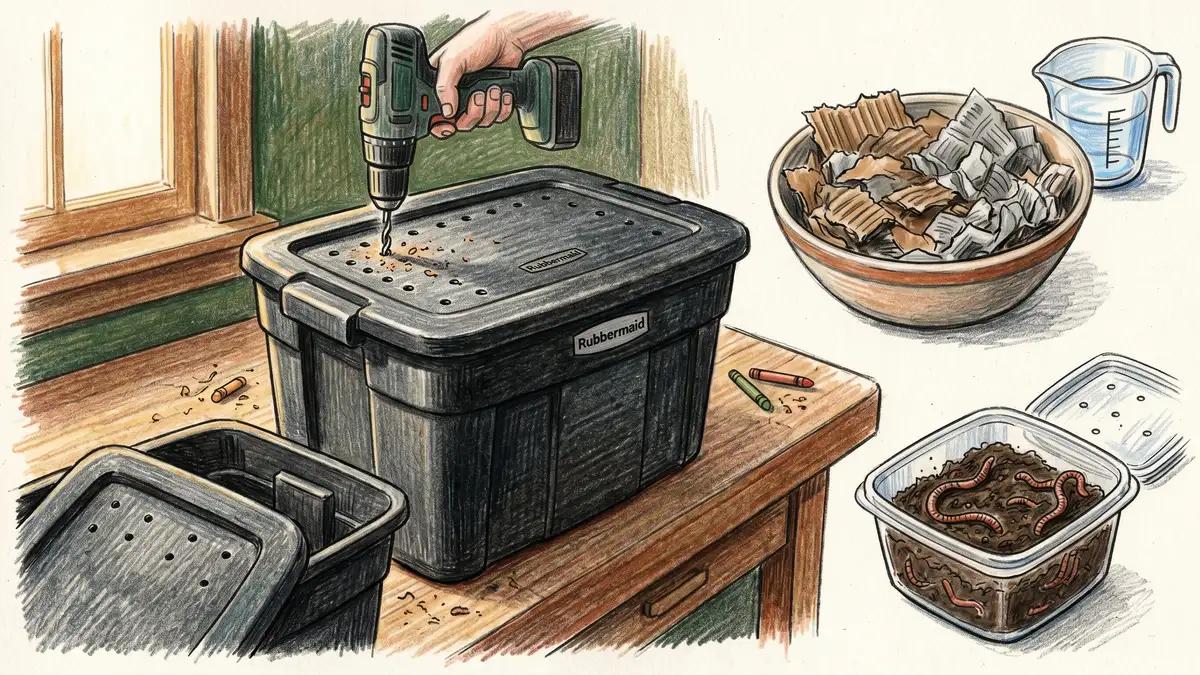
1. Single Rubbermaid tote ($15 to $25, 1 hour to build). The simplest possible worm bin. Take a 13 to 18 gallon (50 to 70 liter) plastic storage tote, drill 8 to 12 quarter-inch (6 mm) holes in the lid for ventilation and another dozen near the base for drainage. Add 4 inches of moist bedding (shredded cardboard + newspaper, moisture like a wrung-out sponge), then 0.5 lb of red wigglers, then a small handful of food waste. Cover, place in a basement or garage at 55 to 77°F. Done.
The catch: harvesting takes 1 to 2 hours every 3 to 6 months by manual light separation. You dump the entire bin onto a tarp, spread the contents thin under bright light, and let the worms burrow downward. Scrape off the top layer of finished castings, repeat. Physically demanding for those with limited mobility, but free of moving parts and fully understandable. Most beginners learn vermicomposting on a single Rubbermaid bin before deciding whether to upgrade.
2. Stacked tray DIY ($30 to $60, 2 hours to build). Three identical totes or 5-gallon buckets stacked vertically with drilled drainage and aeration holes. The bottom tier sits on a small wooden frame elevated 4 to 6 inches off the floor with a collection tray underneath. Active feeding happens in the top tier; worms gradually migrate downward toward older, more decomposed material. Detailed plans at New Soil's homemade vermicomposting bin construction PDF.
The huge advantage over a single tote: harvest via the migration method. Stop feeding the bottom tier for 2 to 3 weeks while you keep adding fresh food only to the top tier. Worms follow the food upward. After most of the worms have migrated up, you remove the bottom tier and harvest its castings with no manual sorting needed. Total harvest labor: 20 to 30 minutes monthly. This is the DIY answer if you want store-bought-like convenience without the $130 price tag.
3. In-ground worm tower ($10 to $25, 30 minutes to build). A 60 to 90 cm length of perforated 4-inch PVC pipe inserted vertically into a raised garden bed or directly into garden soil. Open top (or a closed cap to exclude rain), open or perforated bottom. Drop kitchen scraps directly into the tube. Worms colonize from the surrounding soil, process the material in place, and migrate outward into the bed. Castings stay in the bed and feed your plants directly.
The upside: zero harvest labor. The downside: capacity is small (1 to 2 lb of food waste weekly), winter performance in cold climates degrades to almost nothing, and you can't diagnose problems easily once it's installed. Worm towers are a complement to a primary bin, not a replacement for households with serious food waste streams. Works exceptionally well in Mediterranean and warm-temperate climates.
The 2 store-bought options in detail
Worm Factory 360 ($110 to $145). Made by Nature's Footprint in Washington State, sold by major outdoor retailers and Amazon. The most popular continuous flow-through system in North America with cumulative sales exceeding 500,000 units since 2009 per Uncle Jim's Worm Farm's worm composter review. Four stackable plastic trays, each with proprietary aeration and tray-to-tray drainage, a base with integrated leachate collection spigot, and a vented lid.
Capacity at full population: 5 to 8 lb of food waste per week, with 3 to 4 lb of mature worms distributed across the trays. Footprint: roughly 20 by 12 by 24 inches with all 4 trays stacked. Harvest is the same migration principle as the DIY stacked-tray system: lower-tray feeding stops, worms migrate up, you remove the bottom tray after 2 to 3 weeks and dump its castings (no manual sorting needed since most worms have already left). 15 to 30 minutes per month total maintenance. The Worm Factory Plus variant adds an optional thermostatic heating mat ($170 to $210) for cold climates.
Common complaints: drainage management if the spigot valve fails or you forget to drain it (lower tray can pool leachate). Fruit flies during summer if ventilation drops or bedding gets too wet. The plastic isn't UV-stable, so it lives indoors. About 70 to 80 percent of buyers report being satisfied or very satisfied after the establishment period; long-term retention rates are high.
Hungry Bin ($375 to $450). Designed and manufactured by Hungry Worms Ltd in New Zealand. The premium end of home vermicomposting. A single large rectangular bin (24 by 16 by 16 inches) rather than stacked trays, with internal baffles and a continuous gravity-flow design. Worms remain distributed throughout; older castings settle to the bottom and are harvested through hinged side access doors.
Capacity: up to 4 pounds of food waste daily, roughly 28 lb weekly. This is genuinely several times the Worm Factory 360's capacity, justifying the price for large households or operations producing significant food waste. Manufacturer warranty: 10 years. Many units remain functional 15+ years; the polypropylene body resists UV degradation, so it can live outdoors with appropriate shelter. Harvest takes 10 to 15 minutes monthly: open a side door, scoop or pour out finished castings, close the door.
Common complaints: the upfront cost limits adoption, and the semi-commercial aesthetic isn't for everyone. But user satisfaction among Hungry Bin owners exceeds 85 percent in longitudinal studies of home vermicomposters maintaining systems beyond 3 years.
How to actually set up your bin
This setup process works for any of the 5 bin types above. Total time: 1 to 2 hours, plus waiting for the bin to settle.
Source your bin
For DIY: a clean 13 to 18 gallon (50 to 70 liter) plastic storage tote (Rubbermaid, Sterilite, IRIS) from any hardware store or thrift shop. For store-bought: order online from Amazon, Uncle Jim's Worm Farm, or direct from the manufacturer.
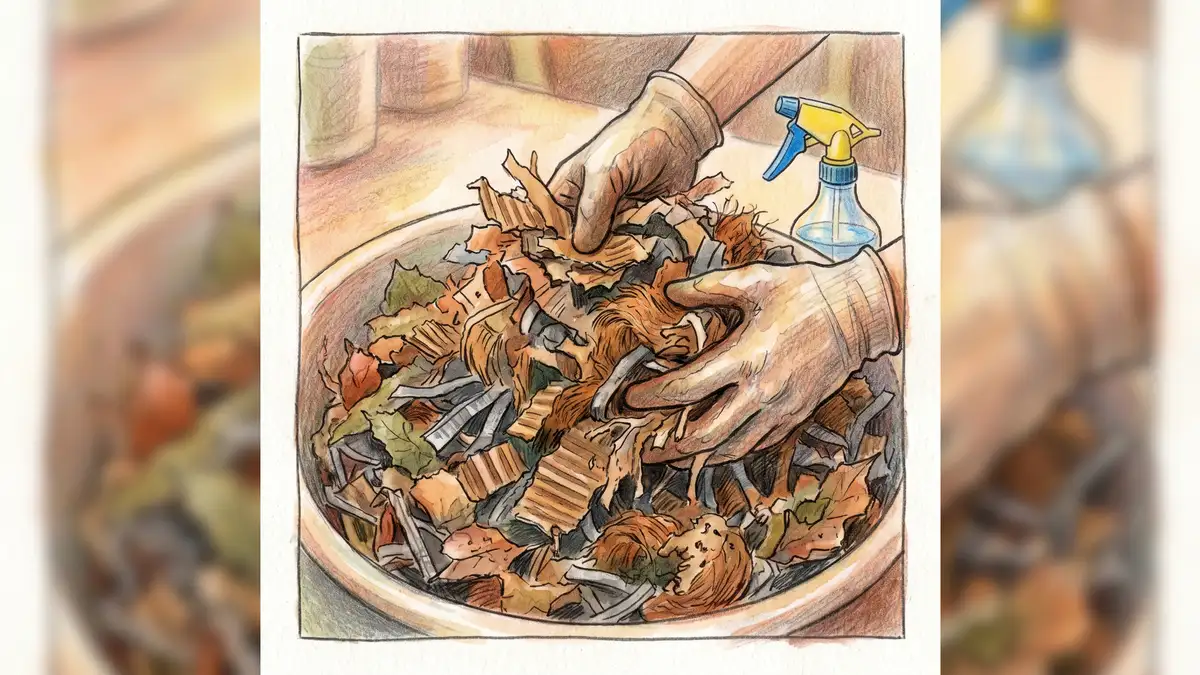
Prepare bedding
Mix shredded corrugated cardboard (preferred per Penn State) with shredded newspaper (no glossy inserts or magazines). Add a handful of coco coir or aged leaves for variety. Soak the mix until it has the moisture of a wrung-out sponge, neither dripping nor crumbly. Fluff to ensure aeration. Fill the bin three-quarters full with this bedding.
Source and add worms
1 lb of red wigglers (Eisenia fetida), about 1,000 worms, runs $30 to $40 from Uncle Jim's Worm Farm or regional suppliers. Less expensive options: local gardening Facebook groups, Craigslist, or a friend's established bin. Spread the worms over the bedding surface; they will burrow down within 5 to 10 minutes once you cover the bin.
Add small first feeding
A handful of vegetable scraps (banana peels, lettuce, coffee grounds with filter, eggshells, vegetable trimmings) buried under 2 inches of bedding. The bedding cover prevents fruit flies and surface-level decomposition odor. For the worms to feed, see our complete worm food list covering yes/no foods.
Place in optimal temperature
55 to 77°F (13 to 25°C) per Cornell. In most US homes, this means a basement, garage, utility room, or under-counter cabinet. Avoid direct sun, drafty exterior walls, and unheated outbuildings in cold winters or hot summers.
Wait one to two weeks before adding more food
Worms need time to acclimate before processing significant food. Resist the urge to overfeed, the most common beginner mistake. After 1 to 2 weeks, start adding food at 0.5 lb per pound of starting worms, gradually increasing as worms reproduce.
Maintain weekly
Add food once or twice a week, buried under bedding. Add fresh shredded cardboard or paper monthly to maintain bedding volume. Check moisture by squeezing a handful of bedding: it should feel like a wrung-out sponge with no water dripping out.
First harvest at 3 to 6 months
Single tote: light separation method (above). Stacked / Worm Factory 360: stop feeding lower tier for 2 to 3 weeks, then remove and dump. Hungry Bin: open side door, scoop castings. The finished product looks like coffee grounds, smells earthy, and pours easily.
Sizing your bin to your household
The basic rule from Cornell Cooperative Extension is 1 square foot of bin surface per pound of food waste per week. The average US household generates 6 to 8 lb of food waste weekly per EPA. Practical implications:
| Household size | Typical food waste / week | Recommended bin | Starting worms |
| Single person | 2 to 3 lb | Single Rubbermaid tote OR Urbalive 2-tier | 0.5 lb (500 worms) |
| Couple | 3 to 5 lb | Stacked DIY OR Worm Factory 360 (start with 2 trays) | 1 lb (1,000 worms) |
| Family of 4 | 6 to 8 lb | Worm Factory 360 (4 trays) OR Hungry Bin | 1 to 2 lb |
| Family of 6+ or restaurant | 10 to 30 lb | Hungry Bin OR multiple Worm Factory 360 systems | 2 to 3 lb (Hungry Bin) or 1 lb per WF360 |
| Heavy gardener (wants extra castings) | Beyond food waste needs | Two-bin Worm Factory 360 OR commercial scale | 2+ lb total |
Sources: Cornell Composting, Six Easy Steps to Setting Up a Worm Bin; Uncle Jim's Worm Farm, Complete Beginner's Guide to Starting Worm Composting; Urban Worm Company, How to Start a Worm Bin
The 5 most common failure modes (and fixes)
Things that go wrong, in order of frequency
Almost every worm bin failure traces to one of these. Most are reversible if caught within a week or two.
1. Overfeeding (the #1 mistake). Symptoms: rotten food smell, fruit flies, acidic conditions, worms congregating at the lid trying to escape. Fix: stop feeding for 2 to 3 weeks, add fresh dry bedding to absorb excess moisture, ensure ventilation is open. Resume feeding at half the previous rate.
2. Fruit fly infestation. Symptoms: small flies hovering around the bin, more dramatic if you open the lid. Fix: bury all food at least 2 inches under bedding, never leave exposed scraps on top. Add a layer of damp newspaper across the bedding surface as a "cover blanket". For active infestations, vacuum the flies and switch to frozen kitchen scraps (freezing kills fruit fly eggs).
3. Anaerobic smell (not earthy, swampy). Symptoms: rotten egg or sewage smell, dark sludgy bedding, very low worm activity. Cause: bedding too wet, no airflow. Fix: open bin, add 6 to 8 inches of fresh dry shredded cardboard, fluff thoroughly, and leave the lid slightly cracked for 48 hours.
4. Worms escaping or massing on the lid. Symptoms: worms on the underside of the lid, worms on bin walls above the bedding, even worms on the floor near the bin. Causes: pH too acidic (often from citrus or coffee overload), bin too wet, oxygen depletion, or temperature shock. Fix: identify the cause, often it's recent feeding, and adjust. A small handful of crushed eggshells helps buffer pH.
5. Drowning in leachate. Symptoms: dead worms in the lower tray of stacked or Worm Factory systems, accumulated brown liquid pooling. Fix: drain the spigot regularly (weekly during heavy feeding seasons), reduce wet food inputs, add more dry cardboard to absorb.
Get our free permaculture starter guide
Building your first compost system is one piece. Our 20-page beginner's guide covers soil, companion planting, and how the whole system fits together. Free.
Open the Beginner's GuideIndoor vs outdoor placement
Indoors wins for most households in temperate climates. Worm bins managed properly produce no detectable odor, take up minimal space, maintain stable temperatures year-round, and stay accessible during winter. Basements, garages, utility rooms, and laundry rooms are ideal. Some practitioners place bins under kitchen sinks or in pantries, particularly with the smaller, design-forward Urbalive ($175 to $235) targeted at apartment apartment-friendly vermiculture setup dwellers.
Outdoors works only in narrow conditions. The Hungry Bin's polypropylene body and design-conscious aesthetics tolerate outdoor placement in mild climates, particularly Mediterranean, Pacific Northwest, and warm-temperate regions where temperatures stay between 50°F and 85°F most of the year. Even then, providing partial shelter (covered patio, lean-to) extends the life of the bin substantially. In cold-winter climates (USDA zones 5 and below), outdoor bins fail to function for 4 to 5 months of the year unless heated or insulated.
For an integrated outdoor approach, the in-ground worm tower works year-round in mild climates but only seasonally in continental climates. The composting basics guide covers complementary outdoor systems for households needing greater capacity.
Sourcing worms in 2026
1 lb of red wigglers (about 1,000 worms) is the standard starting quantity. 2026 prices:
- Uncle Jim's Worm Farm ($30 to $40 per lb): the largest US supplier, ships by mail in breathable packaging. Reliable, established 1985. Discounts for 2 lb or larger orders.
- Urban Worm Company ($35 to $45): smaller specialist, focus on quality and customer support. Multiple species available.
- Local gardening Facebook groups, Craigslist, or NextDoor ($0 to $20): many established vermicomposters give away or sell starter quantities. Often the highest-quality worms because they come from a thriving local population already adapted to your climate.
- Bait shops (variable): occasionally have red wigglers, but verify species since some sell European nightcrawlers (Eisenia hortensis) which work but reproduce slower.
Avoid: pet store "fishing worms" of unknown species. Tropical species like Indian blue worms (Perionyx excavatus) may be appropriate for warm climates but won't survive winter in a temperate bin.
If you remember six things
(1) Single Rubbermaid tote works fine for most beginners; upgrade only when you need more capacity. (2) The Worm Factory 360 ($110 to $145) is the popular default for households generating 4 to 8 lb of food waste weekly. (3) The Hungry Bin ($375 to $450) is for serious long-term operators or large households. (4) Stock at 1 lb of red wigglers (Eisenia fetida) per cubic foot of bedding. (5) Maintain 55 to 77°F (13 to 25°C); place indoors in basements, garages, or utility rooms. (6) The #1 failure mode is overfeeding; resist the urge for the first month, and bury food under 2 inches of bedding to prevent fruit flies.
Ready to grow smarter?
Whether you're starting your first worm bin or building a fully-integrated permaculture system, our free beginner's guide covers the design foundations every productive ecosystem depends on.
Read the free guideBrowse all guides →
Frequently asked questions
What is the best worm bin for beginners?
For most beginners, the Worm Factory 360 by Nature's Footprint ($110 to $145) is the best-balanced choice: capacity for typical household food waste (5 to 8 lb weekly), straightforward harvest via tray rotation (15 to 30 minutes monthly), and reliable durability with long-term user satisfaction. For absolute beginners on a tight budget, a single Rubbermaid tote DIY ($15 to $25) is a fully functional starter bin and an excellent way to learn vermicomposting before investing in a more expensive system.
How do I make a DIY worm bin?
Take a clean 13 to 18 gallon plastic storage tote. Drill 8 to 12 quarter-inch (6 mm) holes in the lid for ventilation and another dozen near the base for drainage. Fill three-quarters full with moist bedding (shredded corrugated cardboard plus newspaper, water until it has the moisture of a wrung-out sponge). Add 0.5 to 1 lb of red wiggler worms. Bury a small first feeding of vegetable scraps under 2 inches of bedding. Place in a basement or garage at 55 to 77°F. Wait 1 to 2 weeks before feeding again. Total cost $15 to $25, total build time about 1 hour.
How many worms do I need to start a worm bin?
The standard starting quantity is 1 pound of red wigglers (Eisenia fetida), about 1,000 worms. Cornell Cooperative Extension's stocking density formula calls for 1 pound of worms per cubic foot of initial bedding. For a single Rubbermaid tote (about 0.07 cubic meters or 2.5 cubic feet), 0.5 lb (500 worms) is adequate; for a four-tray Worm Factory 360, 1 to 2 lb is recommended. Worm populations double in 12 months under good conditions, so initial stocking is a starting point, not the maximum the bin will hold.
What temperature should a worm bin be?
The optimal temperature range for red wigglers (Eisenia fetida) is 55 to 77°F (13 to 25°C). Performance drops below 55°F and worms can die above 85°F. This drives most home worm bins indoors to basements, garages, utility rooms, or under counters. In USDA zones 5 and colder, outdoor placement fails to function for 4 to 5 months annually unless the bin is heated or buried below frost line. Worm Factory Plus offers a thermostatic heating mat ($170 to $210) for cold climates.
Are worm bins smelly?
A properly managed worm bin smells earthy, like damp forest soil, not unpleasant. Strong odors signal a problem: rotten food smell from overfeeding, swampy or rotten egg smell from anaerobic conditions (too wet, poor airflow), or ammonia from excess nitrogen (too much green material relative to bedding). All three are reversible: stop feeding for 2 to 3 weeks, add fresh dry shredded cardboard to absorb moisture, ensure aeration, and resume feeding at half the previous rate.
Can I put a worm bin in the garage?
Yes, with caveats. The garage is one of the most common worm bin placements because temperatures stay relatively stable. The key constraint is that the bin must remain in the 55 to 77°F (13 to 25°C) range. Insulated garages in temperate climates work year-round. Uninsulated garages in cold-winter climates may drop below 55°F for several months, slowing decomposition substantially. Uninsulated garages in hot summer climates may exceed 85°F, killing worms. Check garage temperature for a full year before relying on it as primary placement.
How long does it take to start producing worm castings?
Most worm bins produce harvestable finished castings 3 to 6 months after establishment. The first 6 to 8 weeks are dedicated to acclimation and population establishment with very little castings production. By month 3, you'll see noticeable dark, fluffy casting accumulation in active feeding zones. By months 4 to 6, the bin produces enough finished castings to harvest meaningful quantities (5 to 10 lb from a single tote, 20 to 30 lb annually from a Worm Factory 360 at full capacity). For applications and benefits, see our guide to worm castings as natural fertilizer.
Worm bin vs compost bin, what's the difference?
A compost bin uses thermophilic bacteria and fungi to break down organic matter through heat (130 to 160°F core temperatures), processing material in 3 to 6 months. A worm bin uses cold mesophilic decomposition aided by Eisenia fetida worms, operating at 55 to 77°F and processing material continuously. Worm bins are smaller, indoor-friendly, and produce nutrient-dense castings prized as a premium fertilizer. Compost bins handle larger volumes including yard waste, function outdoors year-round, and produce more bulk compost suitable for general soil amendment. Many gardeners run both: a worm bin for kitchen scraps and high-value castings, an outdoor compost pile for yard waste and bulk compost.
Resources
- Cornell Composting, Six Easy Steps to Setting Up a Worm Bin
- NC State Cooperative Extension New Hanover, Vermicomposting Guide
- UC ANR Napa Master Gardener, Red Wiggler Worm
- Urban Worm Company, How to Start a Worm Bin the Right Way
- Urban Worm Company, Guide to Red Wigglers (Eisenia fetida)
- Uncle Jim's Worm Farm, Complete Beginner's Guide
- Uncle Jim's Worm Farm, Eisenia foetida Red Worm Composting Guide
- Uncle Jim's Worm Farm, Best Worm Composters Recommendations
- Brothers Worm Farm, Ultimate Guide to 9 Best Worm Composters
- Worm People, Choosing a Worm Bin Type
- The Compost Culture, Best Worm Compost Bins for Beginners 2026
- New Soil, Care of Red Wigglers and Homemade Vermicomposting Bin Construction (PDF)


