

You're staring at a patch of lawn (or a weedy mess) and want to turn it into a productive garden bed — but the thought of double-digging, sod cutting, or wrestling a rototiller is exhausting. Here's the better way: layer cardboard, compost, and mulch directly over the existing vegetation. The lawn dies. Earthworms move in. Six months later you have rich, friable soil ready to plant — and you never lifted a shovel. how to build a hugelkultur bed
This is sheet mulching, also called lasagna gardening. It's the foundation technique permaculture designers use to convert lawn to garden, and it works because it copies how forests build living soil: layers of organic matter dropped on the surface, broken down by fungi and worms over time. The cost is $20–$80 for a 100 sq ft bed (mostly free if you scavenge cardboard), the labour is one weekend, and the results outlast tilled beds by decades.
The short answer
Sheet mulching means laying cardboard over existing weeds or lawn, then stacking nitrogen-rich (green) and carbon-rich (brown) layers on top to a total depth of 6–18 inches (15–45 cm). The cardboard smothers what's beneath, the layers compost in place, and earthworms turn it into garden soil. Start in fall for spring planting. Expect to spend $20–$80 per 100 sq ft (9 m²) and one weekend of work.

What Is Sheet Mulching?
Sheet mulching is a no-dig method of building a new garden bed by layering organic materials directly over existing vegetation. The cardboard or newspaper barrier blocks light, killing the lawn or weeds underneath without herbicide. Above the barrier, alternating layers of high-nitrogen "green" material (grass clippings, kitchen scraps, manure) and high-carbon "brown" material (leaves, straw, wood arborist wood chips as the top layer chips) decompose into rich compost over weeks to months.
The technique has three lineages worth knowing. Ruth Stout popularised deep-mulch no-work gardening with hay in the 1950s. Bill Mollison embedded mulching as a foundational practice in his 1978 Permaculture: A Designers' Manual. And in 1998, Patricia Lanza systematised the technique under the name Lasagna Gardening, with the food-layer metaphor that made it intuitive for home gardeners.
What you're actually doing is starting a slow, cold compost pile on top of your soil — and inviting the soil's own ecosystem to digest it from below. That distinction matters: unlike a hot compost pile in a bin, sheet mulching never reaches the 130–150°F (55–65°C) needed to kill weed seeds reliably. So it's a soil-builder, not a sterilisation method. Pre-treat persistent perennial weeds before laying cardboard.
Why this works (the permaculture insight)
Forests don't till. They drop leaves on the surface and let fungi, bacteria, and earthworms cycle nutrients back into the soil from above. Sheet mulching mimics this exact pattern — accretive, surface-fed, biologically driven. Tilling does the opposite: it inverts soil layers, destroys mycorrhizal networks, and exposes dormant weed seeds to light. By staying on the surface, you keep the existing soil structure intact and let the organisms already living there do the work.
Why Sheet Mulching Builds Better Soil Than Tilling
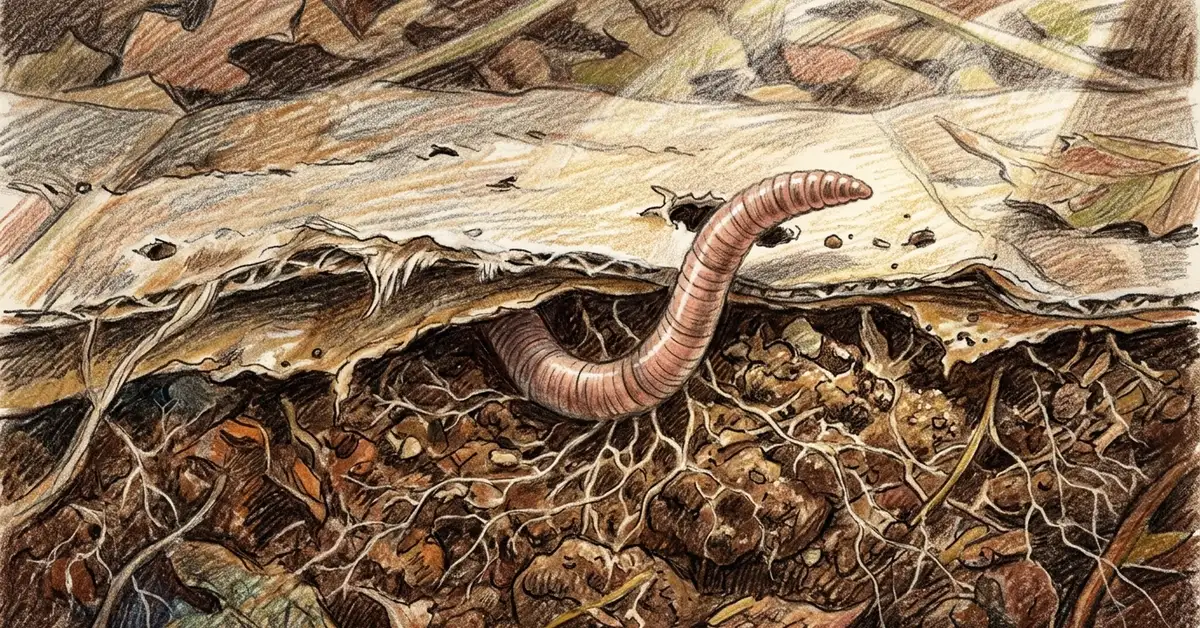
The soil-biology case for sheet mulching is well-documented. UC ANR research on earthworm dynamics shows that earthworm populations track soil organic matter — and sheet mulch piles organic matter directly where worms can access it. Field documentation shows earthworms congregating beneath fresh cardboard within 5–7 days, and biomass tripling or quadrupling within two months as worms shred the cellulose and deposit nutrient-rich castings.
Mycorrhizal fungi — the fine root-extending networks that supply plants with nutrients and drought tolerance — also benefit. (For a deeper look at this whole underground ecosystem, see our guide to the soil food web.) Tilling chops fungal hyphae into useless fragments. Sheet mulching leaves the network intact and feeds it. Over a season, the fungal community rebuilds connections between plant roots and the new compost layer above.
Water retention improves substantially. Research on organic mulch thickness under simulated rainfall found that 1–2 inch (2.5–5 cm) applications increased soil water storage by 51.7–81.6 per cent compared to bare soil, with diminishing returns above that depth. Translated to your garden: a sheet-mulched bed needs roughly 30 per cent less irrigation in the hottest summer months than the same bare ground.
And the system is essentially free. Mechanical tilling burns fuel and degrades soil structure each pass; OSU Extension warns that tilling compacts soil, increases runoff, and disrupts the microbiota that drive plant health. Sheet mulching does the opposite work in the opposite direction.
When to Sheet Mulch (Best Time of Year)
Timing changes how long you wait before planting. The general rule: start in fall, plant in spring.
| Season | Wait time before planting | Best for | Watch out for |
| Fall (Sept–Nov) | 5–6 months | Spring vegetable beds — leaves are abundant, decomposition is slow and complete | Cardboard staying wet through dry autumns |
| Spring (Mar–May) | 4–10 weeks | Transplanting starts; less reliable for direct seeding | Limited green material before lawn growth resumes |
| Summer (Jun–Aug) | 4–8 weeks (with watering) | Hot climates with daily moisture; quick beds for fall planting | Drying out — needs irrigation |
| Winter (Dec–Feb) | 3–4 months in mild zones; pause in frozen zones | USDA zones 9–11 with winter rain | Frozen ground stops decomposition entirely |
Source: OSU Extension — Sheet Mulching and Lasagna Composting with Cardboard
Fall wins because it stacks the conditions in your favour: leaves and grass clippings are at their peak, winter rain saturates the layers, freeze-thaw cycles fracture the cardboard, and by the time spring planting arrives the bed is fully composted with established earthworm populations. Spring is workable if you accept transplanting rather than direct seeding — small seeds struggle to root through a thin compost layer over fresh cardboard.
Materials You'll Need (and Where to Find Them Free)
Sheet mulching is one of the cheapest soil-building methods in gardening because the bulk material is literally what stores throw away. Plan to scavenge most of it.
Cardboard — the barrier layer. You need plain corrugated cardboard, ideally large sheets from appliance boxes (refrigerators, washing machines, mattresses). Free sources: appliance stores, grocery stores (especially produce departments — boxes are flattened daily), hardware stores, and online retailer dumpsters. Free moving-box networks like community giveaway groups also work. For 100 sq ft (9 m²) of bed, plan on 150–200 sq ft of cardboard to allow 6-inch overlaps. Remove all plastic tape and glossy or coloured printed sections.
Wood chips — the top mulch. Free arborist chips are the gold standard. ChipDrop connects tree services with property owners willing to take chip loads — you typically get 4–20 cubic yards delivered for free or a small tip. Local tree services will also drop loads directly if you call. Bagged bark mulch from a garden centre runs $5–$8 per 2 cubic feet bag, which adds up fast on larger beds.
Compost — the planting layer. If you have a home compost pile, this is the time to use it. Otherwise, municipal compost (often $20–$40 per cubic yard delivered) or aged manure from a local farm work well. Avoid uncomposted manure on the surface — it can burn seedlings and may contain residual herbicides if sourced from hay-fed cattle.
Green and brown layer materials. For the green (nitrogen) layers: fresh grass clippings, kitchen vegetable scraps, coffee grounds (some cafés give away buckets daily), comfrey leaves, fresh weeds without seed heads. For brown (carbon) layers: dried leaves, straw bales (a full-size straw bale covers about 80 sq ft of bed), shredded paper, sawdust from untreated wood. The same green-and-brown principle drives backyard compost piles — see our guide to getting the brown-to-green ratio right if you want to understand the chemistry behind it.
| Layer | Material | Coverage for 100 sq ft | Estimated cost |
| Barrier | Corrugated cardboard, doubled, 6-inch overlap | 150–200 sq ft | $0 (scavenged) |
| Green (nitrogen) | Grass clippings, kitchen scraps, manure | 1–2 inches (8–16 cu ft) | $0–$20 |
| Brown (carbon) | Leaves, straw, wood chips | 4–8 inches (32–64 cu ft) | $0–$30 |
| Compost (planting) | Aged compost or finished manure | 2–4 inches (16–32 cu ft) | $10–$40 |
| Top mulch (finish) | Aged wood chips, fine bark, leaf mould | 2–3 inches (16–24 cu ft) | $0–$20 |
| Total | — | 6–18 inches deep | $10–$110 |
Source: Angi — How to Sheet Mulch and Lawn to Garden — Sheet Mulch Catalog.
Want a printable sheet-mulching materials checklist?
We'll send you a one-page checklist with quantities for 100, 200, and 400 sq ft beds, plus a list of where to scavenge each material in your area.
Get the checklistHow to Sheet Mulch in 7 Steps

Mow or scalp the existing vegetation
Cut lawn or weeds to 1–2 inches (2.5–5 cm) and leave clippings on the ground — they'll add nitrogen to the system. OSU Extension recommends against stripping or sodding the surface; the existing root mass becomes part of your compost. Identify and remove persistent perennial weeds (bindweed, Bermuda grass, Japanese knotweed) by digging — cardboard alone won't stop them.
Loosen the soil and amend if needed
If your soil is heavily compacted, use a spading fork to loosen it 6–8 inches (15–20 cm) deep without flipping the layers. Apply lime, rock dust, or other amendments now if a soil test indicated deficiencies — they'll work down through the bed as it composts. Soak the area thoroughly with a hose to wake up the soil microbiome.
Lay the cardboard barrier
Strip all plastic tape and labels from your cardboard. Lay sheets directly on the wet ground, overlapping every seam by at least 6 inches (15 cm) — gaps mean weed escape routes. Two layers thick is the standard. Cut the cardboard around any plants you want to keep. Soak each section as you lay it; dry cardboard becomes hydrophobic and sheds water.
Add the green (nitrogen) layer
Spread 1–2 inches (2.5–5 cm) of nitrogen-rich material on top of the cardboard: grass clippings, kitchen scraps, fresh manure, comfrey leaves. This jump-starts microbial activity that will eat through the cardboard. Water this layer lightly. Penn State Extension notes that the nitrogen layer is critical — without it, cardboard breaks down very slowly.
Add the brown (carbon) layer
Spread 4–8 inches (10–20 cm) of carbon-rich material: dried leaves, straw, wood chips, shredded paper. This is the bulk of the bed and what your roots will eventually grow through. Water until the layer feels like a wrung-out sponge — moist throughout but not soggy.
Top with compost and finishing mulch
Add 2–4 inches (5–10 cm) of finished compost — this is your planting medium. On top of that, finish with 2–3 inches (5–7.5 cm) of aged wood chips, fine bark, or leaf mould for a clean look and to suppress any light reaching the seedbank below. Water the whole bed deeply one final time.
Wait and plant
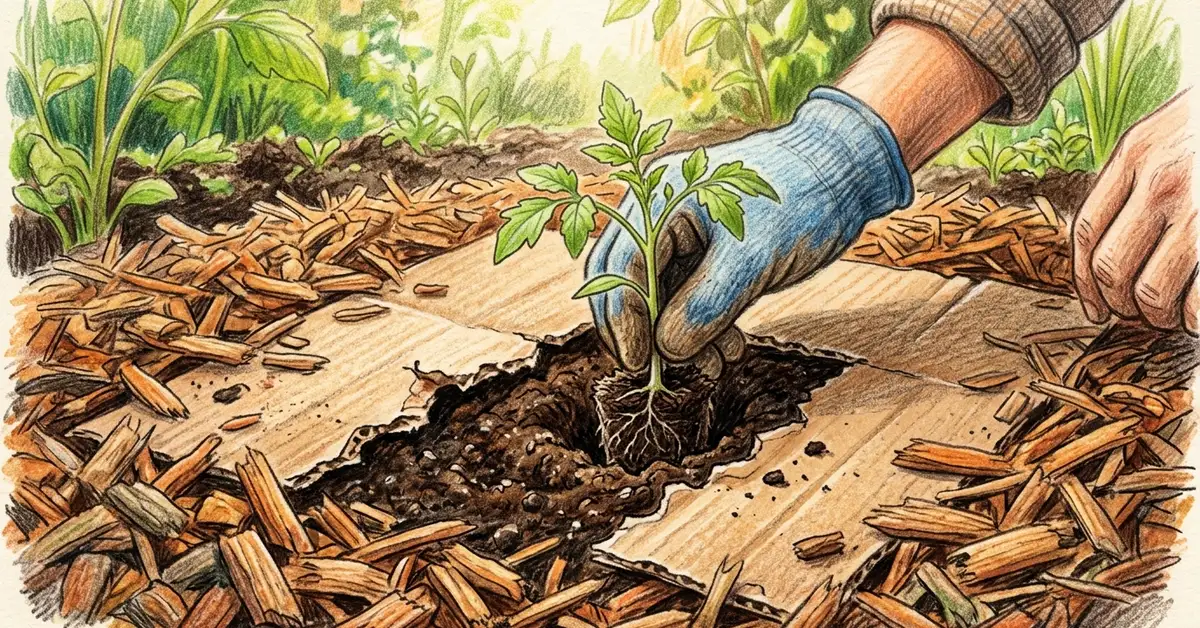
For fall-installed beds, wait until spring. For spring installations, wait 4–10 weeks. To plant, scrape back the top mulch, plant transplants directly into the compost layer, and replace the mulch around the seedling. For deep-rooted crops, cut an X through the cardboard so roots can reach the soil below.
That's the whole protocol. The depth and complexity scale with patience: a quick build (one green layer, one brown layer) gets you 6 inches of mulch and a plantable bed in 4–10 weeks. The "lasagna" build (multiple alternating layers stacked to 18 inches) takes longer but produces deeper, richer soil ideal for heavy feeders like tomatoes and squash.
For a more elaborate guide to the full layered approach, Toby Hemenway's Ultimate Bomb-Proof Sheet Mulch remains the gold standard reference, drawing on his work in Gaia's Garden. If you want to push the technique further, the hugelkultur method stacks logs and woody debris under a sheet mulch to create a self-watering, decade-long bed.

Common Concerns Answered (Honestly)
Sheet mulching attracts repeat objections. Most are based on outdated information or worst-case agricultural scenarios that don't apply to home gardens. Here's the evidence-based picture.
Is cardboard safe? What about dioxin and PFAS? Modern cardboard adhesives are corn-starch based and food-safe. Inks have been predominantly soy-based since around 2002 and are non-toxic. Garden Myths summarised the dioxin question well in their cardboard composting safety review: the EPA and New Zealand's Ministry of Health both concluded that dioxin levels in modern paper products are too low to pose meaningful risk, and dioxin's soil half-life of 1–3 years means even trace amounts degrade quickly. PFAS ("forever chemicals") are present in some coated cardboard but rare in plain corrugated boxes. To be safe, avoid waxed boxes, glossy printed cardboard, and anything with food residue from frozen meals.
Does cardboard attract termites? The myth comes from laboratory studies showing termites preferred cardboard to wood chips when given a choice. Real-world conditions are different. Termites need dry, undisturbed environments to establish colonies — sheet mulch beds are wet, biologically active, and rapidly decomposing, which is the opposite of termite habitat. UC IPM's sheet mulching guide makes no termite warning for residential garden use. Keep mulch 8–12 inches (20–30 cm) away from your house foundation as a general practice and you're fine.
Will it create a slug problem? Yes, briefly. Months 1–3 after installation, slug populations often spike under the moist mulch. Long-term observation shows the spike resolves on its own as ground beetles, centipedes, and other slug predators move in. If you're planting seedlings into a brand-new bed, use iron-phosphate slug bait for the first season — it's pet-safe and breaks down to fertiliser.
Don't sheet mulch over these weeds without pre-treating
Bindweed, Bermuda grass, quackgrass, Japanese knotweed, and deep-rooted thistle have rhizomes powerful enough to penetrate cardboard. Whole Gardens NW calls sheet mulching over these species "a band-aid over an infection." Strip the sod with a sod cutter first, or solarise the area for a full summer (or three, for knotweed) before laying cardboard.
When NOT to Sheet Mulch
Sheet mulching isn't universal. Four site conditions argue against it.
Poorly drained or chronically wet soils. Washington State University research on paper-based mulches shows that wet cardboard and saturated mulch can create anaerobic conditions at the soil surface, suffocating roots and killing existing plants. If water pools on your site after rain, raised beds with imported soil are a better fit, or install drainage before sheet mulching.
Steep slopes (greater than 15% grade). Wet cardboard slips, and decomposing layers can creep downhill in heavy rain. On moderate slopes, secure the cardboard with landscape staples and overlay with jute net. On steep slopes, terrace first — sheet mulch on flat platforms is reliable; sheet mulch on steep grade is not.
Inside the drip line of established trees. Mulch deeper than 2–3 inches (5–7.5 cm) within tree drip lines can cause root suffocation, especially on shallow-rooted species like rhododendron, hemlock, and cedar. Rutgers' guide on over-mulching trees and shrubs documents the risk in detail. Keep cardboard and deep mulch outside the drip line, or use a thinner application near trees.
Contaminated soils. Sheet mulching builds up soil; it doesn't clean it. If your site has a history of heavy metal exposure, pesticide accumulation, or industrial residue, sheet mulching just pads the surface. For contaminated sites, raised beds with imported clean soil and a barrier between the bed and original ground are the right approach.
Ready to design a permaculture garden, not just plant one?
Sheet mulching is the foundation. The next step is laying out beds, water flow, plant guilds, and harvest sequence so the system works for you year after year. Our weekly newsletter walks through one design decision at a time — no fluff, no upsells.
Join the GrowPerma newsletterFrequently Asked Questions
What is sheet mulching?
Sheet mulching is a no-dig method for building a new garden bed by layering cardboard or newspaper over existing vegetation, then stacking alternating layers of nitrogen-rich (green) and carbon-rich (brown) organic materials on top. The cardboard smothers the lawn or weeds underneath, the layers compost in place over weeks to months, and earthworms incorporate the result into rich garden soil. It's also called lasagna gardening.
How long does sheet mulching take to break down?
In temperate climates, fall installations are typically plantable by spring (5–6 months). Spring installations need 4–10 weeks of warm-weather decomposition before transplanting. Warm subtropical climates can produce plantable beds in 4–8 weeks year-round if moisture is maintained. Cold continental climates pause decomposition entirely when soil freezes, so timing matters: don't expect winter progress in zones below USDA 6.
Can I plant directly into a fresh sheet mulch bed?
Yes for transplanting starts, with caveats. Pull back the top mulch, plant the seedling directly into the compost layer, and replace mulch around the stem. For deep-rooted vegetables, cut an X through the cardboard with a utility knife so roots can grow into the soil beneath. Direct seeding small seeds (lettuce, carrots) is unreliable in fresh beds because the thin compost layer over cardboard dries out fast — wait until the second season for direct seeding.
Is the cardboard safe for vegetables?
For plain corrugated cardboard with the tape removed, yes. Modern adhesives are corn-starch based and inks are predominantly soy-based and food-safe. Avoid waxed cardboard, glossy printed cardboard, and frozen-food boxes (which may contain PFAS coatings). Multiple research reviews including Garden Myths' summary of EPA findings conclude that residential garden use of plain cardboard poses negligible health risk.
How much does it cost to sheet mulch a 200 square foot bed?
Roughly $20–$200 depending on what you can scavenge. With free cardboard, ChipDrop wood chips, homemade compost, and grass clippings, a 200 sq ft (19 m²) bed can come in under $40. Buying everything retail (bagged compost, commercial mulch, straw bales) pushes the same bed to $150–$200. Compare to a 200 sq ft raised bed installation at $600–$1,500 and the cost advantage is dramatic.
Will sheet mulching kill bindweed or Bermuda grass?
Not reliably. Both species have aggressive rhizome systems that store enough energy to push new shoots through cardboard or around the edges of mulched areas. Pre-treat persistent perennial weeds before sheet mulching: strip the top 3–4 inches of soil with a sod cutter, or solarise the area under clear plastic for one full summer (three summers for Japanese knotweed). After pre-treatment, sheet mulching reliably suppresses regrowth.
Resources
- Penn State Extension — Sheet Mulching: Lawn to Garden Bed in 3 Steps
- OSU Extension — Sheet Mulching and Lasagna Composting with Cardboard
- OSU Extension — No-Till Gardening Builds Healthier Soil at Home
- UC IPM — Sheet Mulching
- USDA NRCS — Mulching to Improve Soil Health (E484A)
- UC ANR — Earthworm Populations in Relation to Soil Organic Matter Dynamics
- PMC — Efficient Organic Mulch Thickness for Soil and Water Conservation
- Washington State University — The Myth of Paper-Based Sheet Mulch
- Toby Hemenway — The Ultimate, Bomb-Proof Sheet Mulch
- Permaculture Magazine — Sheet Mulching in 9 Easy Steps
- ChipDrop — Free Wood Chip Delivery Service
- Rutgers NJAES — Problems With Over-Mulching Trees and Shrubs
- SARE — Sheet Mulch Using Cardboard and Nitrogen-Fixing Trees


