

A permaculture garden produces in pulses. A homestead kitchen consumes year-round. Food preservation is the bridge between the two, and it is the part of the homestead system most often skipped or underbuilt. This guide covers the 8 core preservation methods, the storage life of common US homestead crops, the safety lines that separate water bath canning from pressure canning, and how to build a preservation calendar that turns one productive summer into 12 months of fed family.
Sources: USDA National Center for Home Food Preservation; University of Maine Extension; UNH Extension; Penn State Extension.
The most productive permaculture garden in the world will not feed a household through winter if the surplus from July rots in August. Permaculture principle 2 is "catch and store energy," and the homestead pantry is where stored energy actually lives. A jar of canned tomatoes, a fermented crock of sauerkraut, a bin of potatoes in the cellar, a vacuum-sealed bag of blanched green beans in the freezer: each is a battery holding the sunlight that fell on the garden in summer and releasing it into the kitchen in February.
This article is for the US backyard homesteader ready to move beyond the garden bed and build the second half of the system. We cover the 8 methods that work, the safety guidance from USDA NCHFP and US extension services, the storage life of the common backyard crops, and the seasonal calendar that ties it all together.
Why preservation is the second half of permaculture
The mismatch between garden output and household consumption is the deepest design problem on every temperate homestead. A 100 sq ft tomato bed in zone 7a can produce 200 to 400 lb of fruit between July 1 and October 15. A family of 4 might eat 5 to 10 lb of tomato per week. Without preservation, more than three-quarters of that bed walks back into the compost pile.
The classic permaculture zone diagram puts the kitchen garden in Zone 1, the orchard in Zone 2, and the woodlot in Zone 3 or 4. The truly integrated homestead adds Zone 0 (the kitchen and pantry) and treats it as continuous with the production zones. You plan the bed sizes by working backwards from the winter pantry: "we want 24 quarts of tomato sauce, 16 quarts of crushed tomatoes, 8 pints of salsa, 6 lb dehydrated for soup base," and that yields the planting count you need.
The same back-from-the-pantry planning applies to potatoes (how many lb in storage for the year), garlic (how many heads at 10 to 15 per lb), onions (storage cultivars vs sweet eating varieties), and meat if you raise livestock. The result is a garden that produces with intention, not by accident, because the storage system upstream is real and known.
Why this works (the permaculture insight)
Permaculture principle 2: catch and store energy. The garden catches solar energy and converts it to carbohydrates, proteins, and fats. Preservation is the storage step. Without it, the entire system leaks: photons captured in June become compost in August. The complete loop runs sun, plant, bed, kitchen, pantry, table, compost, soil, plant. Skip preservation and the loop snaps at the pantry stage.
The 8 core preservation methods
| Method | Best for | Storage life | Equipment cost |
| Root cellaring | Potatoes, carrots, onions, garlic, squash, apples, beets, cabbage | 2 to 12 months | $0 to $500 (basement adaptation) |
| Lacto-fermentation | Cabbage (sauerkraut), peppers (hot sauce), cucumbers (pickles), kimchi | 6 to 18 months refrigerated | $30 to $150 (crock or jars) |
| Vinegar pickling | Cucumbers, beets, peppers, beans, asparagus, radishes | 12 to 18 months sealed | $50 to $150 (jars, canner) |
| Water bath canning | Tomatoes, fruit, jams, jellies, salsas, acidified pickles | 12 to 24 months | $50 to $150 |
| Pressure canning | Green beans, corn, peas, meat, broth, beans, vegetables, soup | 12 to 24 months | $150 to $500 (canner) |
| Dehydration | Fruit, herbs, jerky, mushrooms, tomatoes, peppers | 6 to 24 months | $50 to $400 (dehydrator) |
| Freezing | Berries, blanched vegetables, meat, butter, broth | 6 to 18 months | $300 to $800 (chest freezer) |
| Smoking and curing | Meat, fish, cheese, peppers | 1 to 12 months depending on cure | $50 to $500 |
Source: USDA NCHFP Complete Guide to Home Canning; Penn State Extension; University of Maine Extension preservation publications.
Root cellaring: the lowest-input method
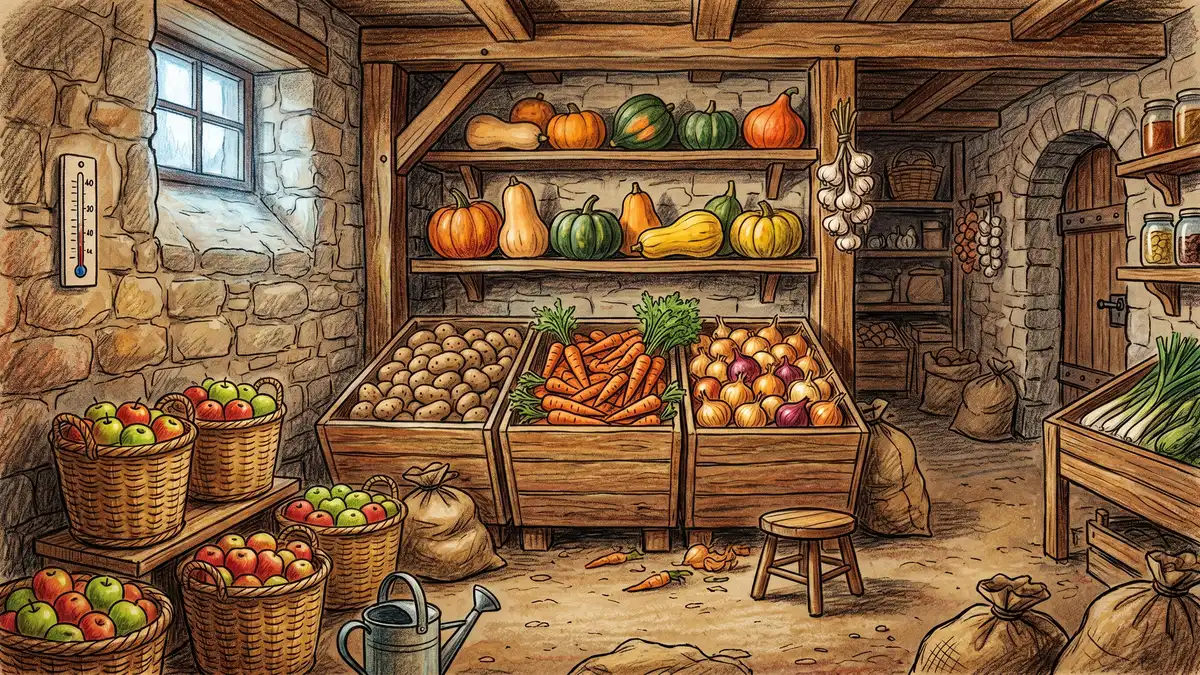
If you can build only one piece of preservation infrastructure, build a root cellar. It uses zero electricity, no recipes, and almost no labor at harvest. The crops go in, you eat them across the winter, you stop buying produce at the grocery store from October through April.
The target conditions vary by crop. Here is the storage life and ideal conditions for the most common backyard crops:
| Crop | Storage life | Temperature | Humidity |
| Potatoes | 4 to 8 months | 40 F | 90% |
| Carrots | 4 to 6 months | 32 to 40 F | 95% |
| Apples | 2 to 4 months | 32 to 36 F | 90% |
| Onions (storage cultivars) | 4 to 8 months | 35 to 40 F | 65% |
| Winter squash and pumpkin | 2 to 6 months | 50 to 60 F | 50% |
| Garlic | 6 to 12 months | 60 to 65 F | 50% |
| Beets and parsnips | 3 to 5 months | 32 to 40 F | 95% |
| Cabbage | 3 to 4 months | 32 to 40 F | 90% |
Source: University of Maine Cooperative Extension Bulletin 4135; UNH Extension Root Cellar guide.
The single biggest design insight: not all crops want the same conditions. Potatoes want it cold and damp. Squash and garlic want it warm and dry. Onions want cold and dry. A serious root cellar has at least 2 microclimates, often a cold-damp zone (potatoes, carrots, apples) and a cool-dry zone (onions, squash, garlic). Most homestead cellars are improvised in a north basement corner with an insulated knee wall and 1 to 2 small wall vents (one low intake, one high exhaust) to manage temperature and humidity.
Apples and potatoes do not store together. Apples emit ethylene gas, which accelerates potato sprouting and root crop softening. Either separate them by 10 ft or more, or store apples in a sealed cabinet within the cellar.
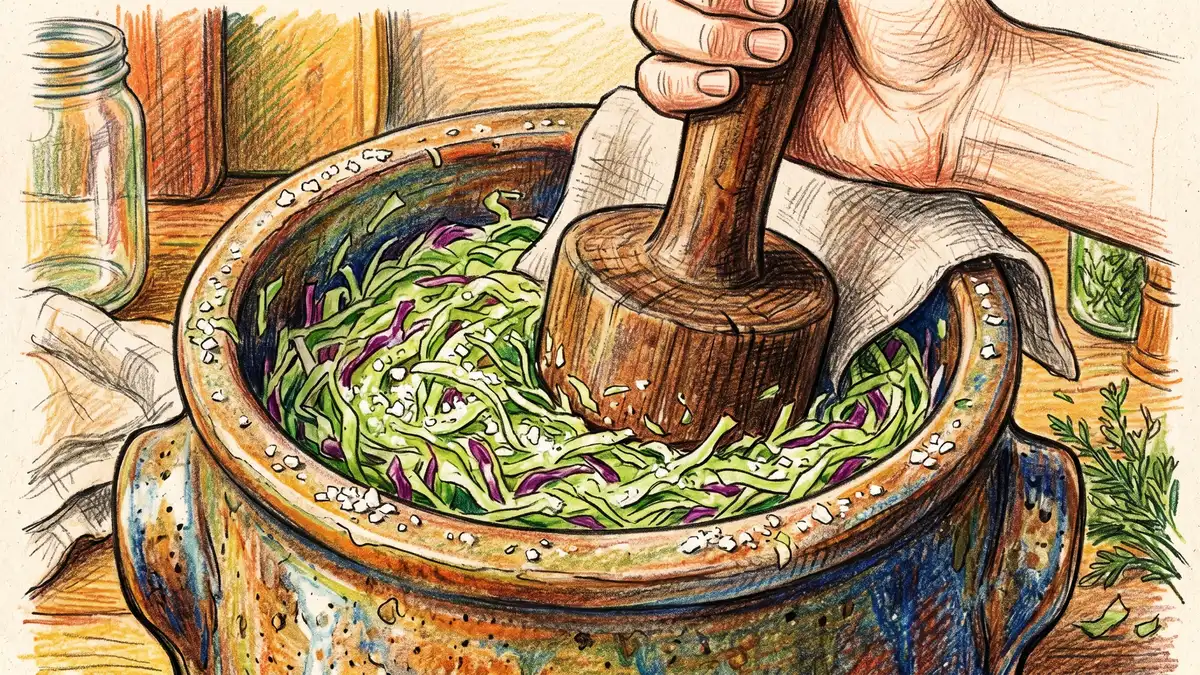
Lacto-fermentation: the biological preservation method
Lacto-fermentation uses naturally occurring Lactobacillus bacteria to convert vegetable sugars into lactic acid, which preserves the food by dropping the pH below 4.0. Pioneered globally for thousands of years and popularized in the modern US through Sandor Katz's Wild Fermentation, it is the most resilient food preservation method ever invented: no electricity, no canning equipment, no recipes from books necessary once you understand the principles.
The core technique is simple. Chop vegetables, salt them at 2 to 3 percent by weight (about 1.5 to 2 tablespoons of non-iodized salt per quart of chopped cabbage), and submerge them under their own brine in an anaerobic container. Wait 1 to 4 weeks at room temperature. Refrigerate or move to a cool cellar.
| Ferment | Primary ingredient | Salt percent | Active fermentation time |
| Sauerkraut | Cabbage | 2 to 2.5% | 2 to 4 weeks |
| Kimchi | Napa cabbage, daikon, scallion, gochugaru | 2 to 3% | 1 to 2 weeks |
| Fermented hot sauce | Hot peppers, garlic, salt | 2 to 3% | 2 to 4 weeks |
| Half-sour dill pickles | Cucumbers, dill, garlic, salt | 3.5 to 5% | 1 to 2 weeks |
| Fermented root pickles | Carrots, beets, turnips, daikon | 2 to 3% | 2 to 3 weeks |
Source: NC State Extension fermentation publications; Penn State Extension; Sandor Katz, The Art of Fermentation (Chelsea Green, 2012).
Safety markers for a good ferment: tangy sour smell (not putrid), firm vegetable texture, cloudy brine, no fuzzy mold. A thin white layer on top (kahm yeast) is harmless and can be skimmed. Black, pink, or orange mold means discard the batch. The pH of a finished kraut should sit between 3.4 and 3.8, which is more acidic than orange juice. At that pH, Clostridium botulinum cannot grow.
Canning: the safety line at pH 4.6
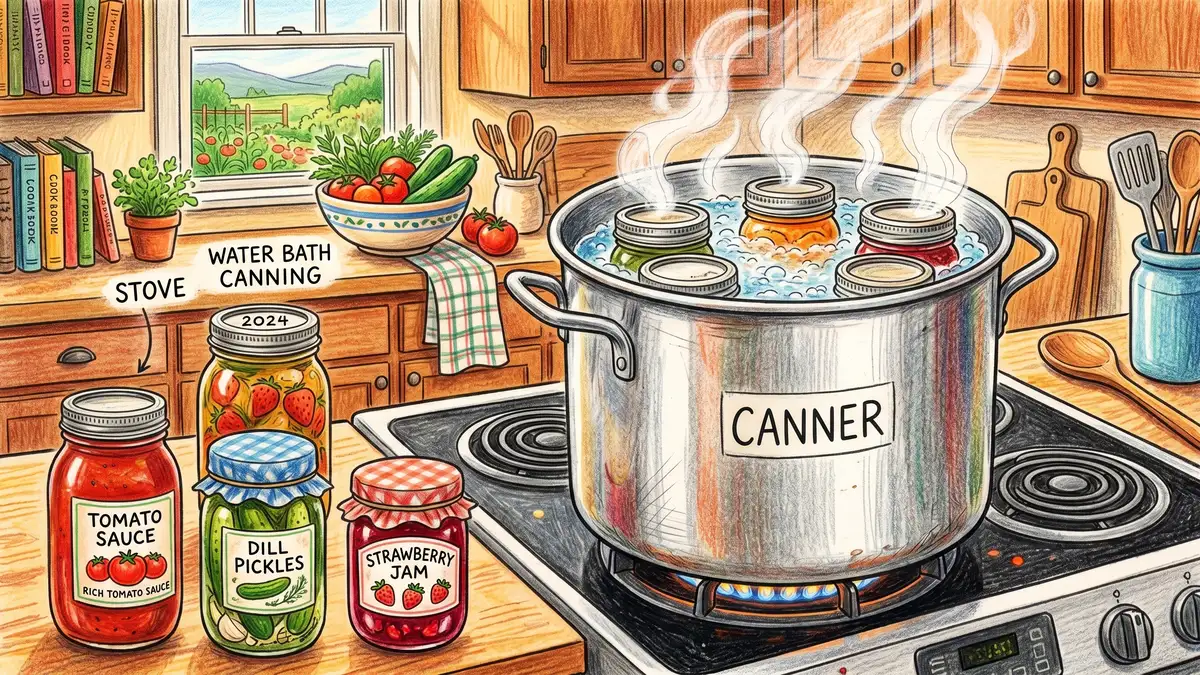
Canning is where the homesteader has to take USDA safety guidance seriously. The single most important rule: low-acid foods (pH above 4.6) cannot be safely water bath canned. They must be pressure canned at 240 to 250 degrees F (10 to 15 lb pressure) to destroy Clostridium botulinum spores. There is no workaround. Botulism is rare in the US precisely because home canners follow this guidance. Most reported home-canning botulism cases trace to people who tried to water bath low-acid vegetables, meat, or "garlic in oil."
Water bath canning works for foods naturally below pH 4.6: most fruits, jams, jellies, fruit butters, acidified tomatoes (with bottled lemon juice or citric acid added), and properly acidified pickles. Processing times depend on jar size, altitude, and food density. Follow USDA NCHFP tested recipes exactly.
Pressure canning works for everything above pH 4.6: vegetables (green beans, corn, peas, asparagus, carrots, beets, potatoes, squash), meat (chicken, beef, pork, venison), broth and stock, dried beans, mixed soups, salsa with low-acid additions. The All American 921 (no gasket, no seal to replace) and the Presto 23-quart are the two pressure canners most US homesteaders settle on. Initial cost $150 to $400. Either canner outlasts a homesteader.
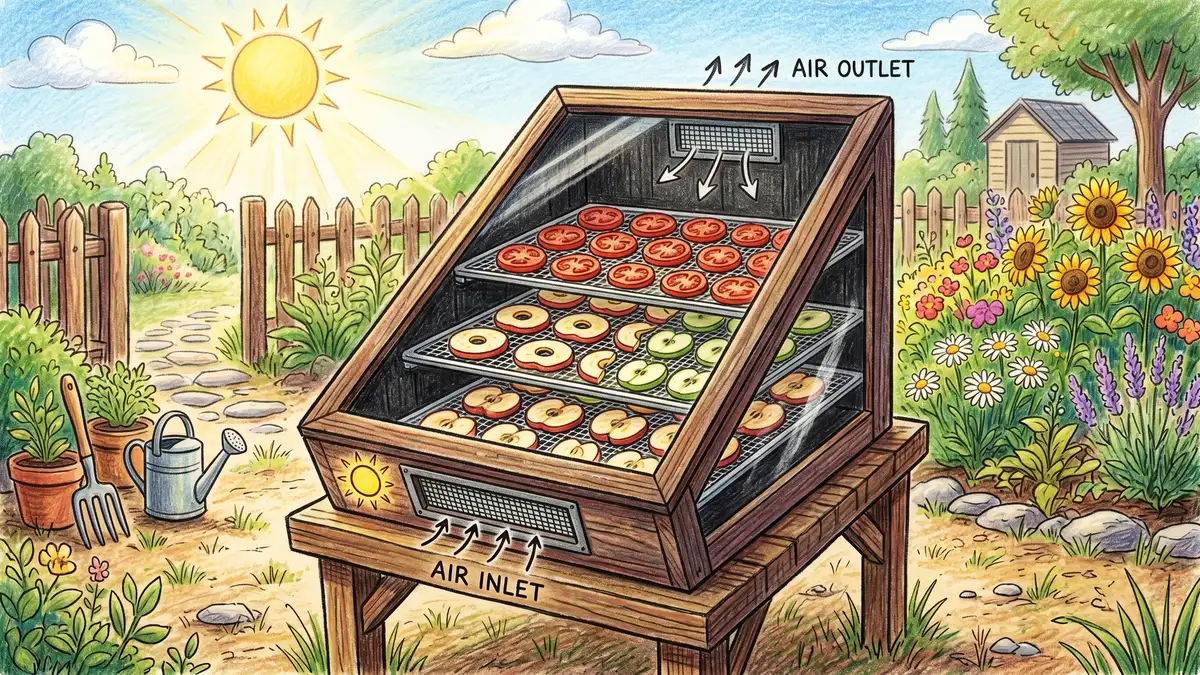
Dehydration: the lightest stored food
Dehydrated food weighs a fraction of its fresh counterpart and stores at room temperature in mason jars for 6 to 24 months. A pound of fresh tomato dehydrates to about 70 grams of tomato chip. A pound of fresh strawberries dehydrates to about 100 grams. The pantry footprint per stored calorie is minimal.
Three dehydration routes work in the US backyard:
- Electric dehydrator: The Excalibur 9-tray ($300 to $400) and the Cosori XL ($100 to $200) are the two homesteader staples. Set 95 F for herbs, 125 F for fruit, 145 F for jerky. 8 to 24 hours per batch.
- Solar dehydrator: A DIY plywood frame with a glass top and dark interior heats to 100 to 130 F in direct sun. Mother Earth News and Cornell Small Farms have free plans for $50 to $200 builds. Best in low-humidity climates (Southwest, mountain West).
- Oven drying: Lowest oven setting (often 150 to 170 F), door cracked open with a wooden spoon, 4 to 12 hours. Works for anything but uses a lot of electricity per batch.
Common dehydrated homestead products: apple rings, tomato chips, jerky (with proper salt cure), mushrooms, herbs (basil, oregano, thyme, mint), berries, pepper flakes, kale chips, and dehydrated soup powder bases. Store finished product in clean glass jars with oxygen absorbers for maximum life.
Freezing: the easiest method when grid is reliable
A chest freezer is the simplest, most flexible preservation tool in the modern homestead. The downside: it ties food security to grid reliability. A 3-day power outage in summer can ruin 6 months of stored harvests.
Blanch most vegetables before freezing: a 1 to 3 min hot water dip stops enzyme activity that otherwise degrades color, texture, and nutrients in the freezer. Cool immediately in ice water, drain, then freeze on cookie sheets in a single layer before bagging. The single-layer pre-freeze prevents clumping and keeps the food usable in small portions.
Berries freeze straight (no blanch). Sliced peaches, plums, and apricots benefit from a quick toss in ascorbic acid water to prevent browning. Meat freezes for 6 to 12 months with vacuum sealing. The FoodSaver V4840 is the standard vacuum sealer for US homesteaders.
The annual permaculture preservation cycle
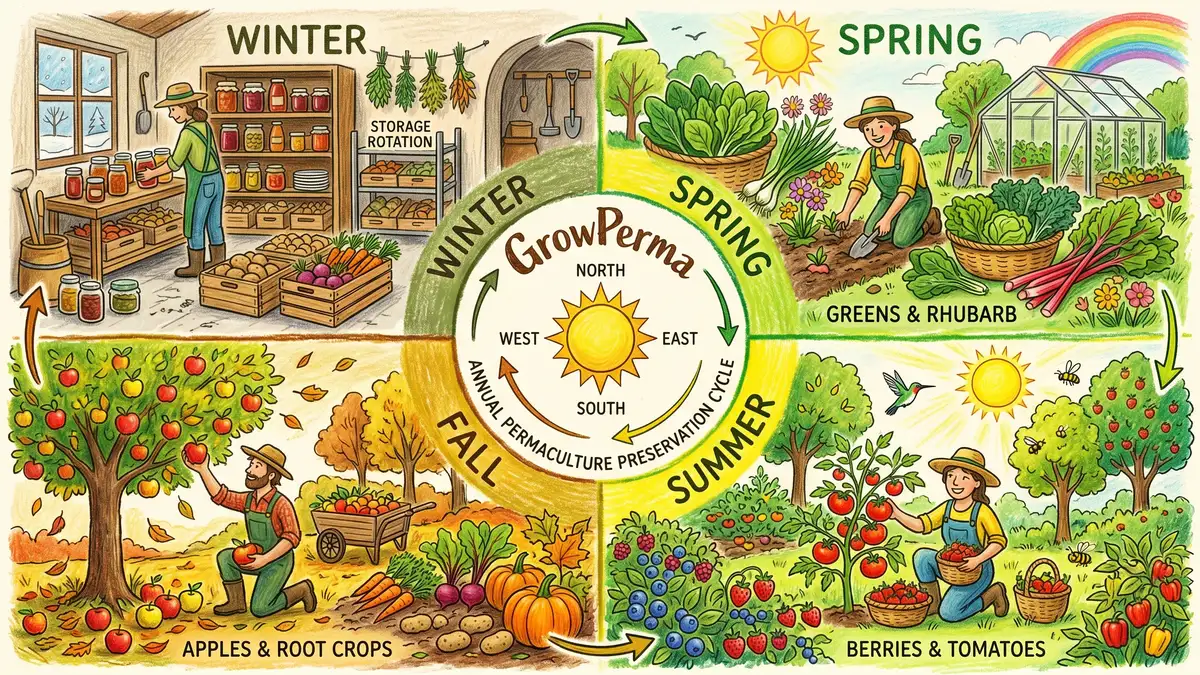
A permaculture preservation calendar maps the annual flow of inputs and outputs. Here is a representative US zone 6 to 7 homestead cycle.
Spring (April to June): the green pulse
Asparagus (water bath pickled, frozen blanched, dehydrated), rhubarb (jam, frozen, dehydrated), early greens (frozen blanched, dehydrated for soup base), strawberries (jam, frozen whole, dehydrated). Empty out last year's frozen storage to make room. Inventory the cellar for what survived winter.
Early summer (June to July): berries and stone fruit
Blueberries, raspberries, blackberries (frozen, jam, dehydrated). Cherries (frozen pitted, dehydrated, brandied). Peaches and plums (canned in syrup, frozen sliced, jam). Sugar snap peas and shell peas (frozen blanched). Garlic harvested, cured 3 weeks in shade then moved to dry cellar storage.
Peak summer (July to August): the tomato wave
The single biggest preservation pulse of the year. Tomatoes (canned crushed, canned sauce, dehydrated chips, frozen whole). Cucumbers (fermented pickles, vinegar pickles, refrigerator pickles). Hot peppers (fermented hot sauce, dehydrated flakes). Green beans (pressure canned, frozen blanched). Corn (frozen kernels, pressure canned cream corn). Summer squash (frozen shredded for winter bread).
Late summer (August to September): the second wave
Eggplant (caponata canned, frozen sliced). Melons (frozen for smoothies). Sweet corn finishing. Tomatillos (salsa verde water bath canned). Onions harvested, cured 2 weeks, moved to cellar.
Fall (September to November): the root crop pulse
Apples (cellared, sauce canned, butter canned, dehydrated rings, frozen pie filling). Pears (canned, dried). Winter squash and pumpkin (cured 10 to 14 days at 80 F, then cellar). Potatoes (cured 2 weeks, then cellar). Carrots and beets (cellared in damp sand or sawdust). Cabbage (sauerkraut, kimchi, cellared). Brassicas (frozen blanched). Sauerkraut crocks start fermenting.
Winter (December to March): rotation and planning
Active eating from cellar, freezer, and pantry. Monthly rotation check (potatoes for sprouting, apples for bruising, squash for soft spots). Cull and use anything heading downhill. Plan next year's preservation needs: which jars emptied first, which still half full, what to grow more or less of.
The homestead preservation infrastructure
A complete homestead preservation system includes the following infrastructure, in rough order of priority:
- Chest freezer (15 to 25 cu ft): The single most useful preservation appliance. $400 to $800 new, often $200 used.
- Pressure canner (All American 921 or Presto 23-quart): The gatekeeper to preserving any low-acid food safely. $150 to $400.
- Water bath canner (large stockpot with rack): $50 to $100. Cheap and easy.
- Excalibur or Cosori dehydrator: $100 to $400. The Cosori XL is the best beginner option.
- 5 to 10 gallon ceramic fermentation crock (Ohio Stoneware, Humble House): $100 to $200. Lasts decades.
- Basement root cellar adaptation: Insulated north corner with 2 vents. $200 to $500 in materials.
- FoodSaver V4840 vacuum sealer: $200. Extends freezer life by 2 to 4 times.
- 3 to 5 dozen quart mason jars and lids: $50 to $100. Add 2 to 3 dozen per year as canning load grows.
Total upfront investment for a full system: $1,200 to $2,500. The payback is fast. A productive homestead displaces $3,000 to $8,000 of grocery store food per year once the preservation pipeline is operational.
The pantry as Zone 0
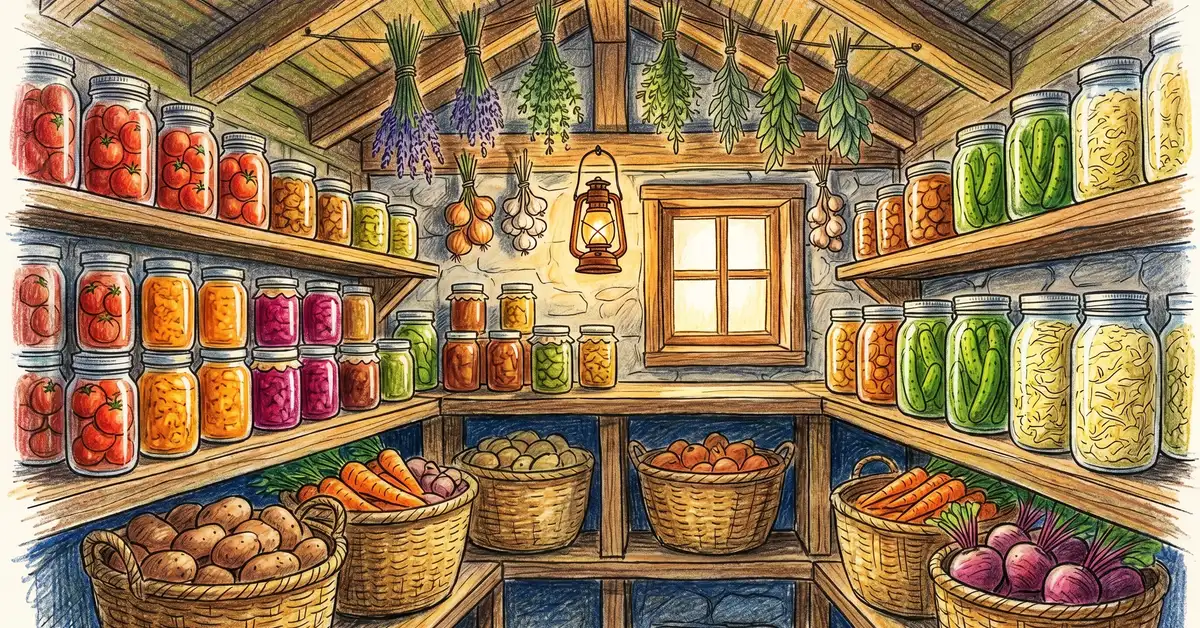
The finished homestead pantry organizes by preservation method and rotation. Top shelves get canned goods (lighter, less frequently accessed). Mid-height shelves get jars, dehydrated foods, and ferments in transition. Lower shelves get root crops in ventilated bins. The deepest part of the cellar gets the long-term root crops. The dehydrated herbs hang from rafters or pegs on the wall.
Two rules keep the pantry working: First, label every jar with the contents and the date sealed. A jar of "looks like jam, from sometime" wastes food. Second, rotate first-in-first-out. The oldest stuff comes off the shelf first. New batches go behind older ones. This single discipline prevents the inevitable basement archaeology dig where year 3 jars are found behind year 1 jars.
Design a complete permaculture homestead
Food preservation is one layer of a multi-stack homestead system. The free 7-Layer Backyard Guide walks through how to lay out the production beds, perennials, and pantry storage that turn a backyard into a working homestead.
FAQ
What are the main food preservation methods?
The 8 core methods for the US homestead are root cellaring (cold storage of root crops, apples, squash), lacto-fermentation (sauerkraut, kimchi, hot sauce), vinegar pickling, water bath canning (high-acid foods only), pressure canning (low-acid foods), dehydration (fruit, herbs, jerky), freezing (most foods), and smoking and curing (meat and fish).
How do you preserve vegetables without a refrigerator?
The five non-refrigerator methods are root cellaring (in a cool, humid space at 32 to 50 degrees F for root crops, apples, squash), lacto-fermentation (sauerkraut, kimchi, pickles at 2 to 3 percent salt), water bath canning, pressure canning, and dehydration. A well-built root cellar plus a fermentation crock plus a pressure canner can replace 80 percent of the function of a refrigerator for the average homestead.
What is the difference between water bath canning and pressure canning?
Water bath canning processes jars in boiling water at 212 degrees F at sea level. It is safe only for high-acid foods (pH below 4.6) including most fruit, jam, acidified tomato, and pickles. Pressure canning processes jars in a sealed canner at 240 to 250 degrees F (10 to 15 lb pressure). It is required for all low-acid foods (pH above 4.6) including vegetables, meat, broth, and beans. Botulism in home canning almost always traces to water bath canning of low-acid foods.
How long do root vegetables last in storage?
At optimal conditions: potatoes 4 to 8 months at 40 F and 90 percent humidity; carrots 4 to 6 months at 32 to 40 F and 95 percent humidity; onions 4 to 8 months at 35 to 40 F and 65 percent humidity; garlic 6 to 12 months at 60 to 65 F and 50 percent humidity; winter squash 2 to 6 months at 50 to 60 F and 50 percent humidity; apples 2 to 4 months at 32 to 36 F and 90 percent humidity.
How long does sauerkraut last?
Properly made sauerkraut (2 to 3 percent salt by weight, fully submerged under brine, fermented 2 to 4 weeks at room temperature) keeps 6 to 12 months refrigerated or 4 to 6 months in a cool cellar at 40 to 50 F. Texture softens over time but the food remains safe as long as the brine pH stays below 4.0 and no fuzzy mold appears.
How do you preserve meat without electricity?
The four off-grid meat preservation methods are dry curing with salt (jerky, salt pork, country ham), smoking (hot smoking, cold smoking after curing), pressure canning (chicken, beef, pork, broth in jars), and fermenting (dry-cured salami, traditional fermented sausages). All four require precise salt percentages and temperature control to be safe. Follow USDA NCHFP guidance for any meat curing.
Do you need to blanch vegetables before freezing?
Yes for most vegetables. A 1 to 3 minute blanch in boiling water stops enzyme activity that otherwise degrades color, texture, flavor, and nutrients in the freezer. Cool immediately in ice water, drain thoroughly, then freeze in a single layer before bagging. Vegetables that skip blanching (tomatoes, peppers, onions, herbs) have low enzyme issues but still benefit from quick handling.
What is the cheapest food preservation method?
Root cellaring is the cheapest. Zero electricity, zero recipes, low equipment cost (most homesteaders adapt an existing basement corner for $200 to $500). Lacto-fermentation is a close second: a $100 ceramic crock or a $30 mason jar setup, salt, and time. Both methods deliver months of stored food per harvest pulse without ongoing energy input.
New to permaculture? Start with our or the.
Resources
- USDA National Center for Home Food Preservation: Complete Guide to Home Canning
- University of Maine Cooperative Extension: Storage Conditions for Fruits and Vegetables (Bulletin 4135)
- UNH Extension: Root Cellars Fact Sheet
- Penn State Extension: Let's Preserve Fermented and Pickled Vegetables
- NC State Extension: Preserving Vegetables by Fermentation
- Cornell Small Farms: Solar Food Dryer Plans
- Mother Earth News: DIY Solar Food Dehydrator Plans
integrated duck pond systems


