

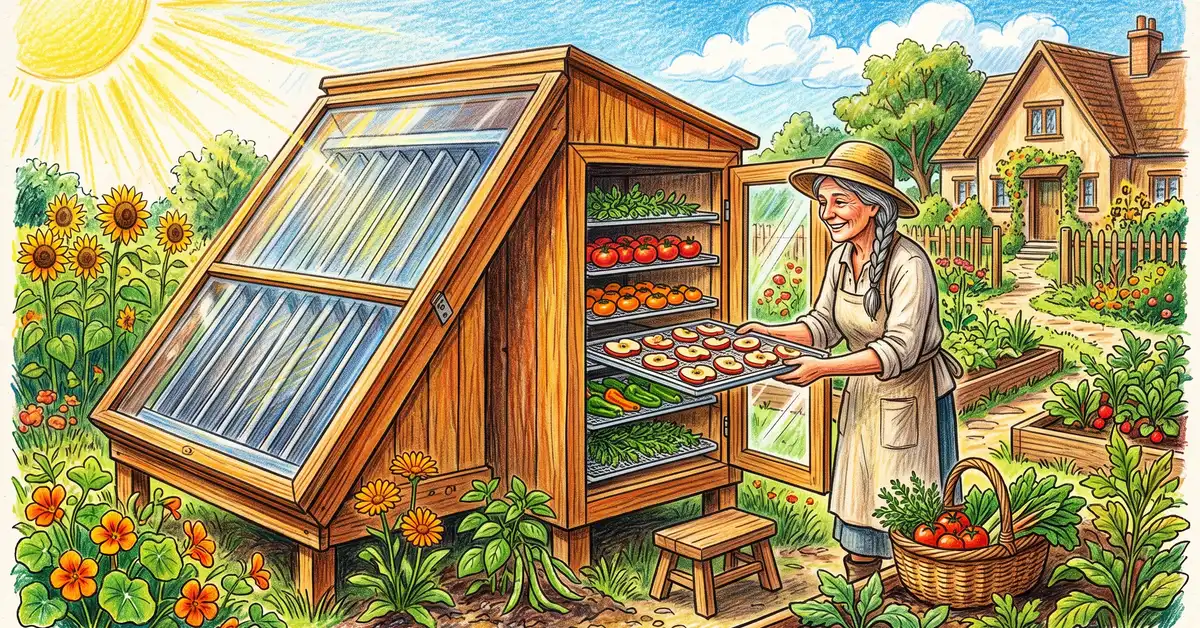
August arrives. Your tomatoes are coming in faster than you can eat them, herbs are bolting, peppers cover every counter, and you keep thinking "I should learn to dehydrate this." Then you look up an electric dehydrator and remember it pulls 600 to 1000 watts for 8 to 24 hours per batch. A solar dehydrator does the same job with sunlight, costs $40 to $150 to build, and runs for free every clear day from May through September. This is how to choose a design, build one in a weekend, and turn your harvest surplus into shelf-stable food using nothing but free energy.
Why a solar dehydrator is the permaculture-correct way to preserve food
Permaculture has a short list of foundational principles, and a solar dehydrator quietly checks several of them at once. Catch and store energy, the second principle, means harvesting flows of energy when they are abundant and storing them in a stable form for later use. Summer sunlight in the US runs roughly 4 to 7 peak sun hours per day depending on region (NREL Solar Resource Maps). A solar dehydrator converts that flow into dried food that sits on a pantry shelf for 6 to 12 months. Obtain a yield, use and value renewable services, and produce no waste all show up in the same device.
The comparison with conventional preservation is striking. A standard electric food dehydrator draws 600 to 1000 W for 8 to 24 hours per batch. A canning session uses propane or electricity for an hour or more and demands jars, lids, pressure equipment, and careful temperature monitoring. A solar dehydrator, once built, runs on sunshine and gentle convection. The energy input across its working life is whatever you spent assembling the wood, glazing, and mesh.
Why this works
Drying food to roughly 10 to 20 percent moisture removes the water that microbes and enzymes need to spoil food, which is why properly dried fruits, herbs, and vegetables keep for months without refrigeration. The National Center for Home Food Preservation documents this principle in detail. A solar dehydrator simply uses the sun (instead of resistance heating) to push that water out, which is the same approach human cultures have used for thousands of years across the Mediterranean, the Andes, and the American Southwest.
The two designs you will actually choose between
Solar dehydrator designs split into two families. Each has a sweet spot and a failure mode you should know before you start building.
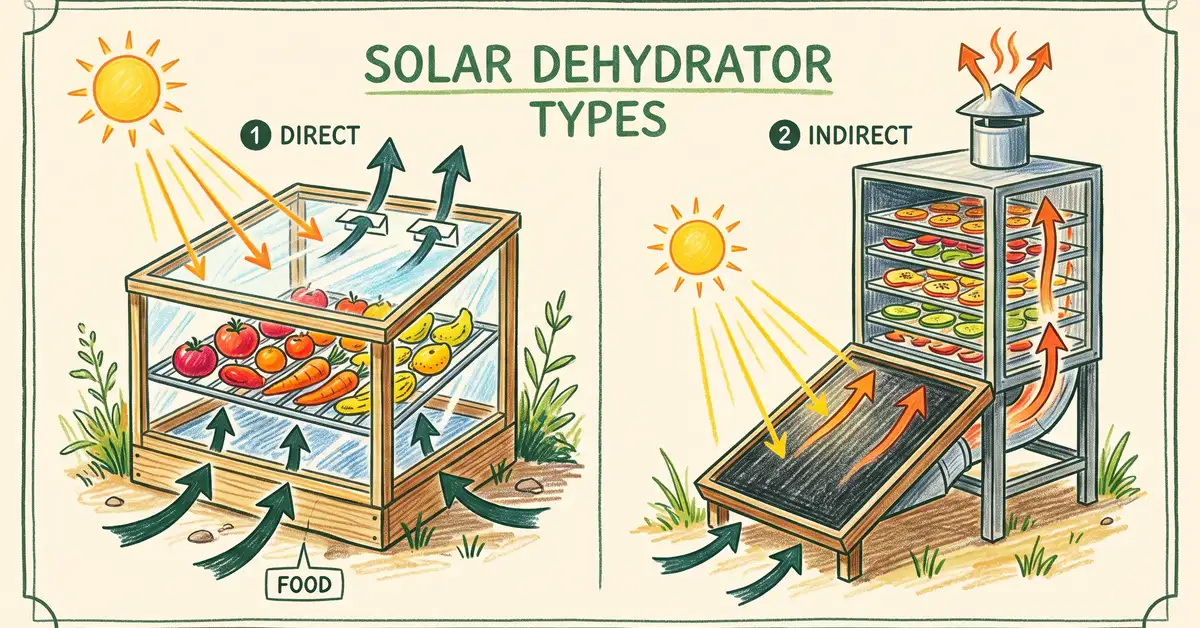
Direct solar dehydrator
Food sits in a clear, glazed box and sunlight hits it directly. The box doubles as collector and drying chamber. Pros: simple, cheap (often under $30), small footprint. A glazed wooden box about 24 in by 36 in by 6 in (60 by 90 by 15 cm) with mesh trays inside is a workable backyard build. Cons: direct UV degrades colour, flavour, and heat-sensitive vitamins (particularly vitamin C and beta-carotene). Internal temperatures can spike above 160°F (71°C) on hot days, which case-hardens food and traps moisture inside. Best for: herbs, hot peppers, and tough fibrous fruits like figs and dates where some colour loss is acceptable.
Indirect solar dehydrator
A glazed solar collector panel heats outside air, and that heated air flows through a separate, shaded drying chamber where the food sits on stacked trays. Pros: food retains colour and nutrients better, temperatures stay in the safe 110 to 145°F (43 to 63°C) zone with passive design, larger capacity, works well on partly cloudy days. Cons: larger build (typically 5 to 7 ft tall, 1.5 to 2.1 m), more materials, more carpentry. This is the design Eben Fodor popularised in the US homestead community with his published plans, and it is what most permaculture educators recommend for serious annual production.
Inside an indirect dehydrator: the science in one diagram

The whole machine is three connected parts arranged so heat does the work for you. The collector at the bottom is a shallow, dark-painted, glazed box angled to face the sun. Air enters through a screened intake at the lower end, gets heated by the dark absorber, and rises by natural convection. The drying chamber above holds horizontal mesh trays of sliced food. Hot dry air passes up through the food, picking up moisture as it goes. The exhaust vent at the top releases the now-humid air, which pulls more dry air in from below and keeps the cycle going. There are no fans, no pumps, no electronics. Physics drives the entire system, just like a passive solar greenhouse.
Build a Fodor-style indirect dehydrator in a weekend
This is a workable starter spec drawn from Eben Fodor's published designs and Appalachian State University food dehydrator notes, scaled for a typical US backyard.
Gather materials ($75-130, half a day)
Frame: 2x2 in pine or cedar, about 30 linear ft (9 m). Sheathing: 1/4 in plywood, one 4x8 ft sheet. Glazing: 24 in by 48 in (60 by 120 cm) twin-wall polycarbonate or tempered glass for the collector face. Absorber: matte black-painted aluminum sheet or corrugated roofing the same size as the glazing. Trays: 4 wooden frames roughly 18 in by 22 in (45 by 55 cm), each fitted with food-grade fiberglass or stainless steel mesh. Hardware: hinges, screws, weather stripping, exterior wood glue, food-safe high-temp paint (matte black) for the absorber.
Build the collector (2-3 hours)
Assemble a shallow box about 24 in by 48 in by 4 in deep (60 by 120 by 10 cm), open on top. Paint the inside matte black. Mount the absorber sheet inside, leaving a 1 in (2.5 cm) air gap underneath for airflow. Cut a screened intake (mesh insect screen) at the lower end. Glaze the top with polycarbonate or glass, sealed with weather stripping. Tilt: set the collector at a fixed angle equal to your latitude plus 10 degrees for summer production. For the continental US that is typically 35 to 50 degrees from horizontal.
Build the drying chamber (2-3 hours)
An insulated wooden box, roughly 24 in wide by 22 in deep by 36 in tall (60 by 55 by 90 cm). Walls: plywood with 1 in (2.5 cm) rigid foam insulation inside. Front: a hinged door with a small viewing window if you want one. Inside: horizontal rails to slide in 4 mesh trays at 6 in (15 cm) spacing. Bottom: an inlet duct that mates to the top of the collector. Top: an exhaust vent fitted with a removable damper to control airflow.
Connect, seal, and site it (1 hour)
Mount the collector below and the drying chamber above on a wooden frame so hot air flows naturally up. Seal all joints with high-temp silicone. Site the assembly facing true south (in the Northern Hemisphere), away from shading trees and structures, on a level pad. A south-facing patio, deck, or open lawn corner works fine.
Test run with a thermometer (first sunny day)
Put an oven thermometer inside the empty chamber for the first run. On a clear summer afternoon between 11 a.m. and 4 p.m. the chamber should reach 110 to 140°F (43 to 60°C) with the damper partially closed. If temperatures stay below 100°F (38°C) close the damper more. If they spike above 150°F (66°C) open it wider. Adjust airflow before loading food.
Which foods dry well in solar, and at what temperature
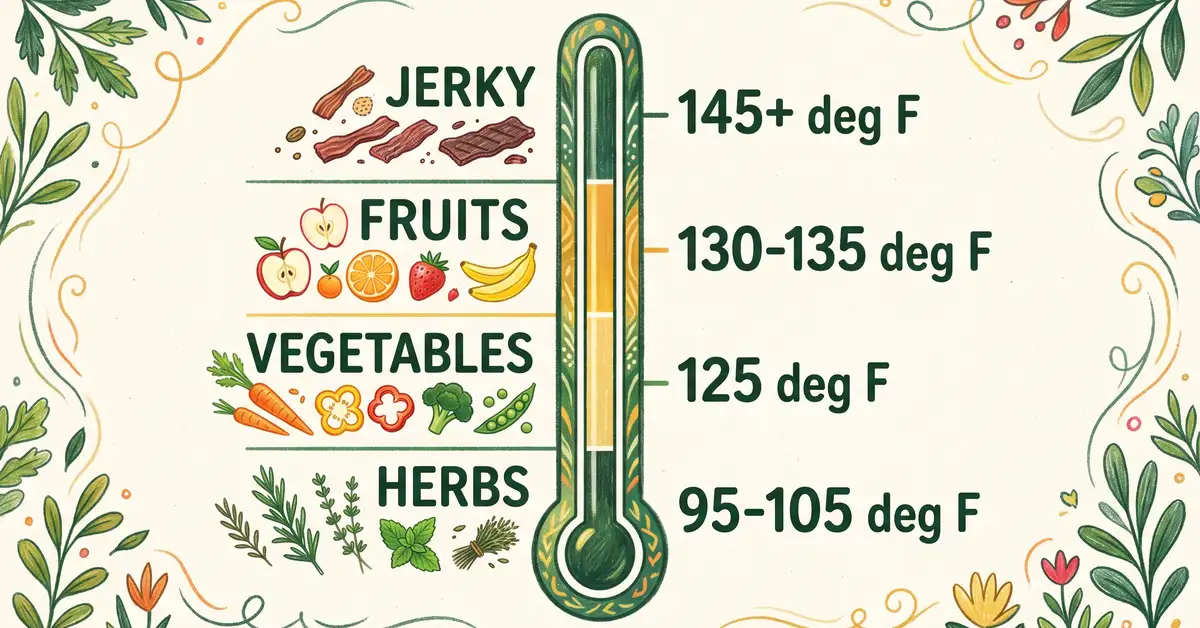
Different foods need different drying temperatures. Too low and food spoils before it dries. Too high and the surface case-hardens, trapping moisture inside. The targets below come from Colorado State University Extension and Penn State Extension guidance for home drying.
| Food | Target temperature | Approx. drying time (sunny days) | Prep notes |
| Herbs (basil, oregano, mint, thyme) | 95 to 105°F (35 to 40°C) | 1 day | Whole sprigs, single layer, low airflow |
| Tomatoes (sliced 1/4 in) | 125 to 135°F (52 to 57°C) | 1.5 to 3 days | Optional lemon juice dip for colour |
| Apples, pears (sliced 1/4 in) | 130 to 135°F (54 to 57°C) | 1 to 2 days | Lemon juice or ascorbic acid bath prevents browning |
| Peppers (sliced or whole) | 125 to 135°F (52 to 57°C) | 1 to 2 days | Wear gloves for hot varieties |
| Leafy greens (kale, spinach) | 120°F (49°C) | 1 day | Strip stems, single layer |
| Mushrooms (sliced) | 125°F (52°C) | 1 to 2 days | No wash, brush clean only |
| Stone fruit (plums, peaches, apricots) | 135°F (57°C) | 2 to 3 days | Halve, pit, place skin-down |
Source: Colorado State University Extension, Penn State Extension, National Center for Home Food Preservation
The five things that decide whether your batch succeeds
After the build, success comes down to a few details. Skip them and you get mouldy fruit or leathery, blackened tomatoes. Get them right and you produce pantry-shelf-quality dried food consistently from late spring through early fall.
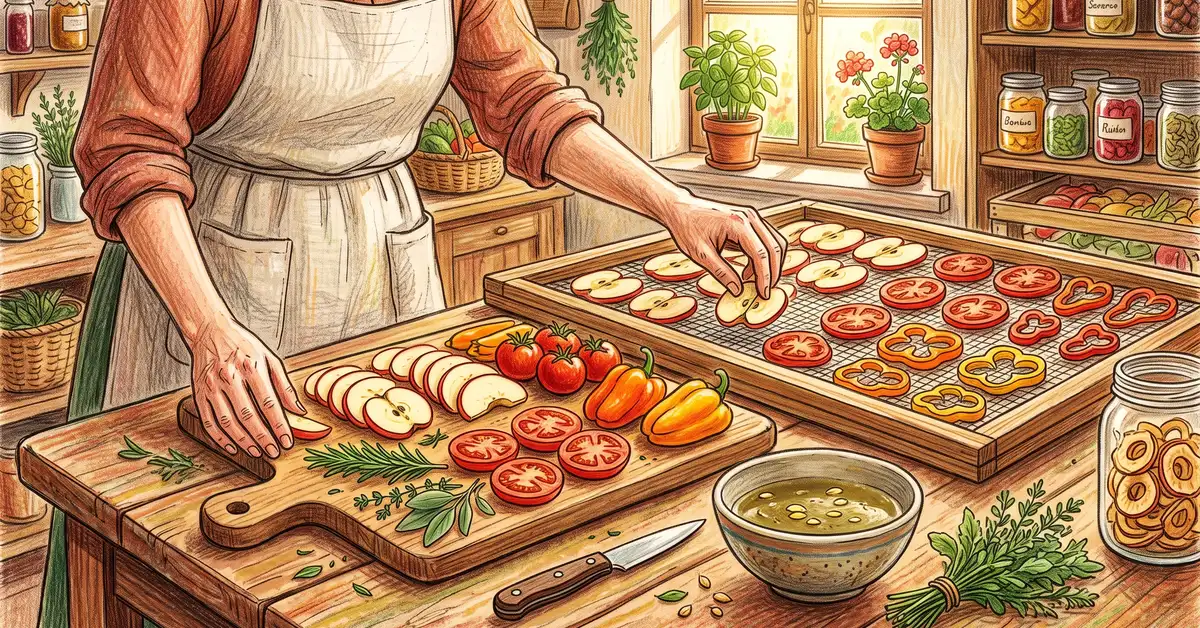
- Single layer, never stacked. Slices touching each other hold moisture and stay wet. Leave at least 1/4 in (6 mm) of mesh visible between slices.
- Slice consistently and thin. 1/4 in (6 mm) is the standard target for fruits and vegetables. Thicker slices simply will not dry before the sun goes down.
- Pretreat fruit prone to browning. A 30 second dip in lemon juice or a 5 minute soak in an ascorbic acid solution (1 tsp powder in 1 cup water) keeps apples, pears, peaches, and apricots looking bright.
- Bring the trays inside at night. Cool, humid night air rehydrates partially-dried food. Pull the trays into the kitchen or a dry porch after sundown, then return them at 10 a.m. the next morning.
- Test for doneness, then condition. Fruit should be leathery and pliable, not sticky. Vegetables should be crisp and snap cleanly. Once you think a batch is done, "condition" it for 4 to 10 days in a sealed jar, shaking daily. If moisture beads appear inside the jar, return the food to the dehydrator for another day.
Storing dried food so it lasts the full pantry year
Storage decides whether your work pays off. Properly dried food at 10 to 20 percent moisture stored in airtight glass jars in a cool, dark pantry holds its quality for 6 to 12 months. Improperly stored food re-absorbs ambient humidity and spoils in weeks. The National Center for Home Food Preservation recommends pint or quart canning jars with two-piece lids, label each jar with food type and drying date, store in a pantry below 70°F (21°C) if possible, and check jars in the first two weeks for any sign of condensation inside (which means the food needs more drying).
For longer-term storage (1 to 2 years), add a food-grade oxygen absorber or a small silica gel packet, vacuum-seal the jar, and store in the back of the pantry. Dried herbs in particular keep their colour and flavour much longer when oxygen is excluded.
Where a solar dehydrator fits in a permaculture food system
A working backyard food system rarely runs on one preservation technique. Permaculture practitioners typically stack methods so each surplus has a path. Tomatoes get canned for sauce and dehydrated for pizza topping and snacking. Apples become fresh storage in a cold cellar, dried rings for school lunches, and fermented vinegar from peels. The solar dehydrator handles the herbs, the small batches, and the late-summer glut that would otherwise overwhelm both fridge and freezer. Permaculture Foundations covers the broader framework these techniques fit inside.
This is also where the climate angle becomes practical. The same backyard food that protects you from supermarket disruption sequesters carbon through soil biology and replaces electricity demand with sunlight. A solar dehydrator is not a single-purpose gadget. It is the visible part of a system that gets you closer to food sovereignty on a yard-scale budget.
Ready to design a complete food preservation system?
Our free 7-Layer Backyard guide shows how dehydration, canning, fermentation, and root cellaring fit together in a regenerative food system on a quarter-acre. Step-by-step plans, plant lists, and seasonal timelines.
Read the Free GuideFrequently asked questions
How long does a solar dehydrator take to dry food?
Most fruits and vegetables dry in one to three sunny days at typical US summer conditions. Tomatoes and apples take 1.5 to 3 days, herbs dry in a single day, and tougher items like apricots can take 3 days. Cloudy weather extends drying time substantially. Plan around forecasted clear weather and avoid starting batches if 2+ overcast days are predicted.
Is solar-dried food safe to eat?
Yes, for fruits, vegetables, and herbs when dried to 10 to 20 percent moisture and stored properly. The National Center for Home Food Preservation documents safe protocols for solar drying of plant foods. Solar drying of meat and dairy is generally NOT recommended for home users because temperature consistency is harder to guarantee, and pathogens require sustained 145 to 165°F (63 to 74°C) to be reliably killed.
Can I use a solar dehydrator in winter?
In most of the US, no. Below about 40 degrees latitude you may get usable solar drying weather into October and again in March. North of that, summer is the only reliable season. Use the solar unit from May through September and an electric backup for off-season needs.
Do I need to use any electricity at all?
For passive indirect designs, no. The system runs on natural convection. Some commercial hybrid units include a small DC fan powered by a 5 to 10 W solar panel for cloudy-day boost. This is optional and the unit still works without it.
What about food safety with insects?
Use fine mesh screens (window screen mesh, 18x16 weave) on every air intake and the exhaust vent. The hot air column inside the chamber is uninviting to most insects, but screens are still essential. Avoid plastic mesh; opt for fiberglass or stainless steel that can handle 140+°F (60+°C) temperatures.
How much food can I dry in one summer?
A 4-tray indirect dehydrator running 30 to 50 productive solar drying days per summer (May through September) processes roughly 200 to 400 lbs (90 to 180 kg) of fresh food per year, yielding 30 to 60 lbs (14 to 27 kg) of dried product. For a household, that is a substantial portion of annual fruit and herb consumption.
Is it worth buying a kit instead of building?
Commercial passive solar dehydrator kits cost $300 to $800. DIY builds run $40 to $150 using standard hardware-store materials. If you have basic woodworking skills and a weekend, building is the better economic choice. If you are time-constrained and want the unit producing this season, a kit is worth the premium.
What is the difference between a solar dehydrator and a solar oven?
A solar oven concentrates sunlight to reach 250 to 350°F (120 to 175°C) for cooking. A solar dehydrator deliberately stays at 95 to 145°F (35 to 63°C) to gently dry food without cooking it. Different temperature targets, different optical designs.
Can I dry food in just my car windshield or on a sunny porch?
Passively, yes for small herb batches in a single sunny day. For anything with moisture content above 50 percent (most fruits and vegetables), a real dehydrator with controlled airflow is needed to prevent spoilage during the slower drying process.
What plans should I use to build mine?
Eben Fodor's "The Solar Food Dryer" book contains the most-referenced US plans. Appalachian State University and several extension offices have published free designs online. Build Your Own Solar Food Dryer plans from sustainable living publications are also widely used. Use any reputable plan and adapt collector area to your latitude and food volume targets.
Resources
- National Center for Home Food Preservation: General Information on Drying (target moistures, conditioning, storage)
- Colorado State University Extension: Drying Vegetables (temperature targets, prep notes)
- Penn State Extension: Let's Preserve - Drying Vegetables (test for doneness, storage)
- USDA FSIS: Jerky and Food Safety (why meat is not solar-safe)
- NREL: US Solar Resource Maps (peak sun hours by region for sizing)
- Solar Cooking Archive: Eben Fodor Solar Food Dryer (most-referenced US plans)


